

Can You Root A Phone Remotely
The biggest hurdle to rooting is that information technology usually requires a figurer. Things get complicated when you're trying to use a desktop operating system to exploit a mobile OS, and the connection isn't ever reliable. But with the aid of Magisk, you tin can now apply i Android phone to root another.
- Don't Miss: How to Root Android 11 Using Magisk
For this to become a reality, y'all need to brand apply of ADB and Fastboot commands, tools that were removed from Android in an earlier version. The good news, though: there'south now a Magisk module that brings that functionality back, which had been taken away so long ago. Developers osm0sis and Surge1223 made this possible through their work on the module, so a big cheers to them.
What Yous'll Need
- One Android device that's already rooted with Magisk
- A 2nd Android device that you want to root
- USB data cable or OTG adapter for connecting ii devices
- The main rooted device should have USB OTG back up
- The device to exist rooted needs to have an unlockable bootloader
Step i: Install ADB & Fastboot for Android
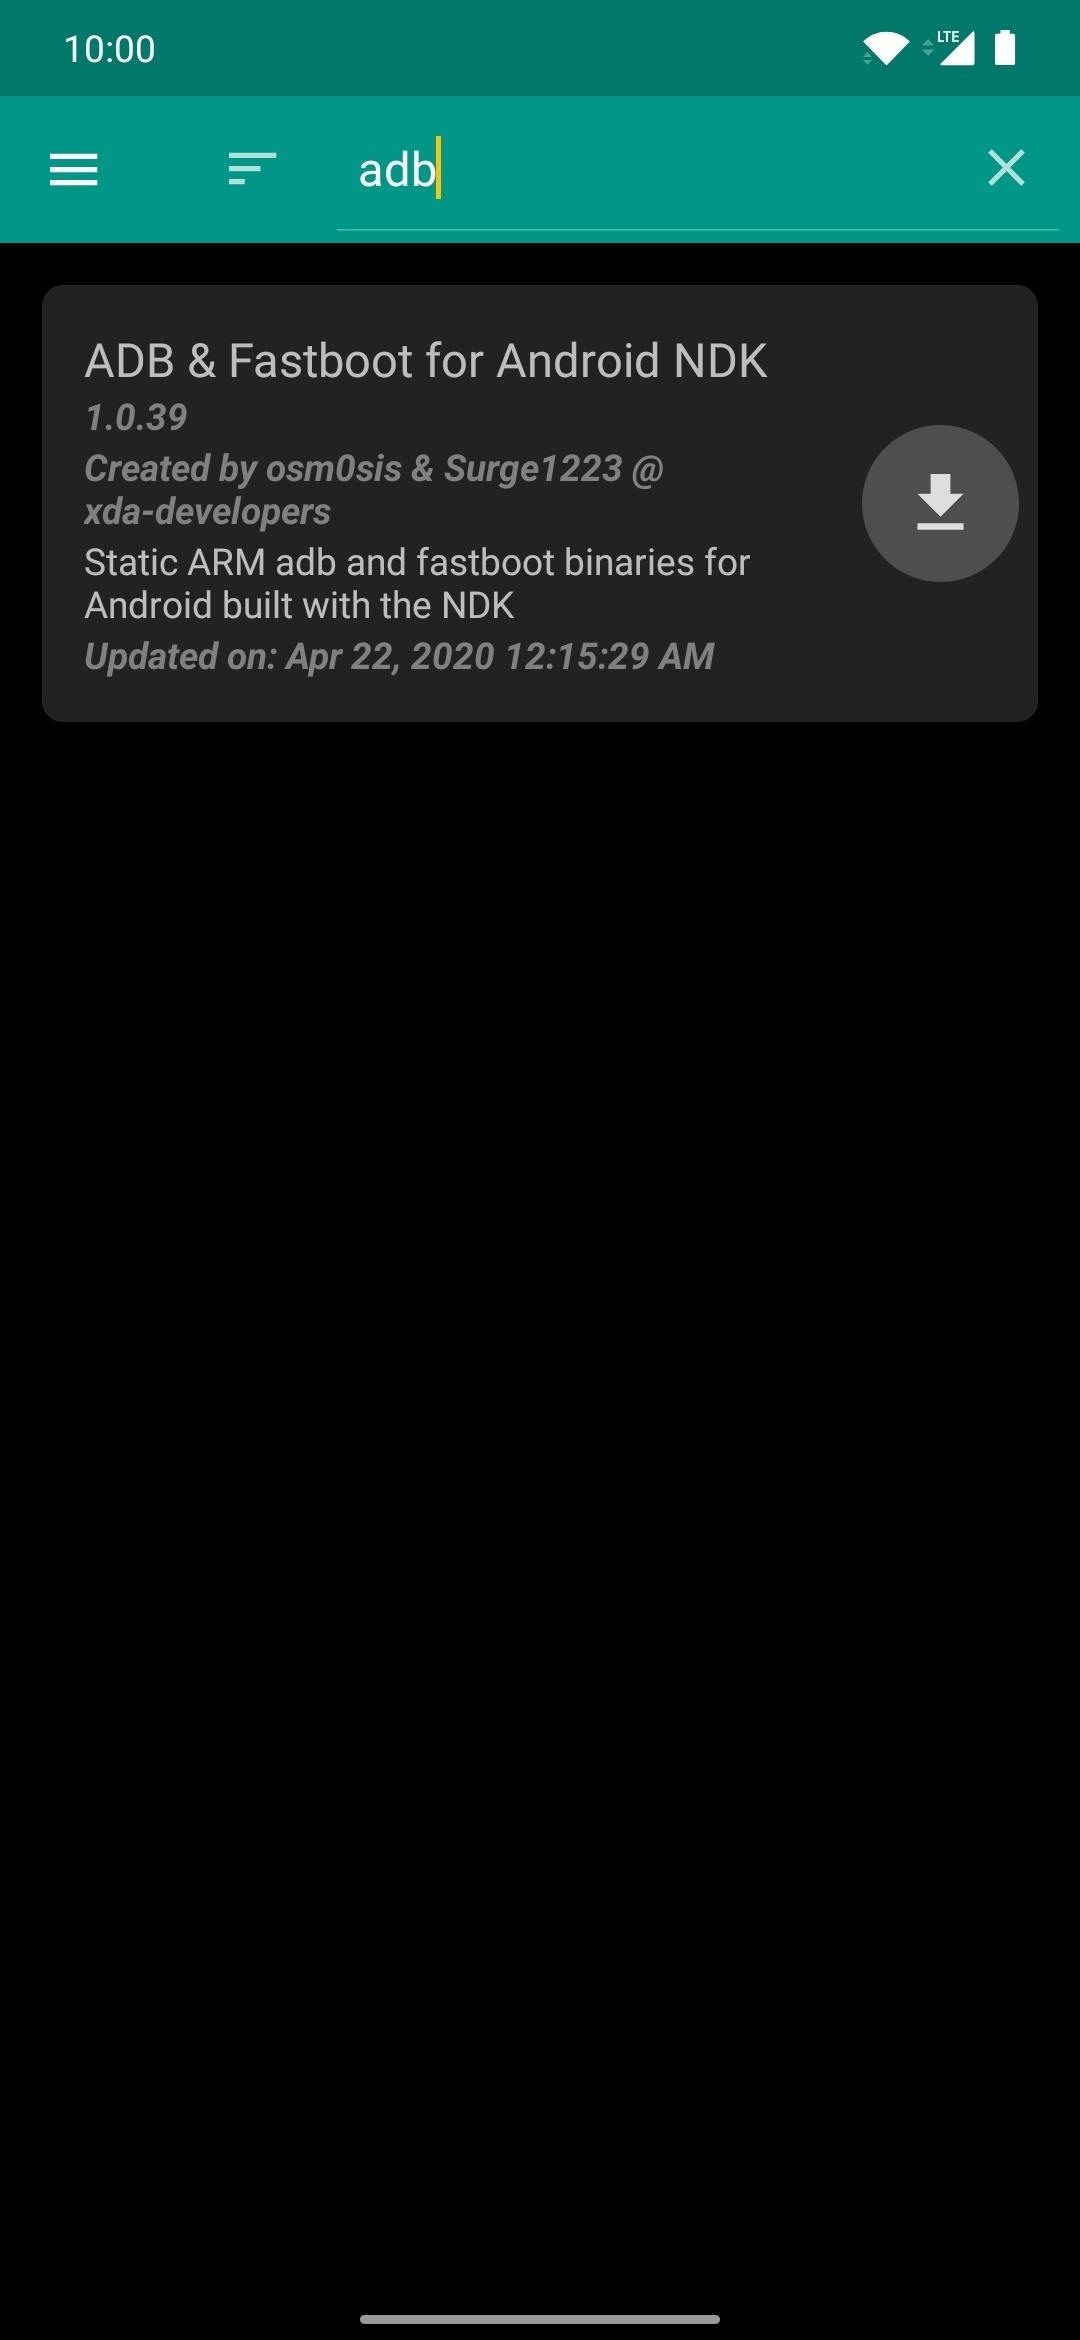
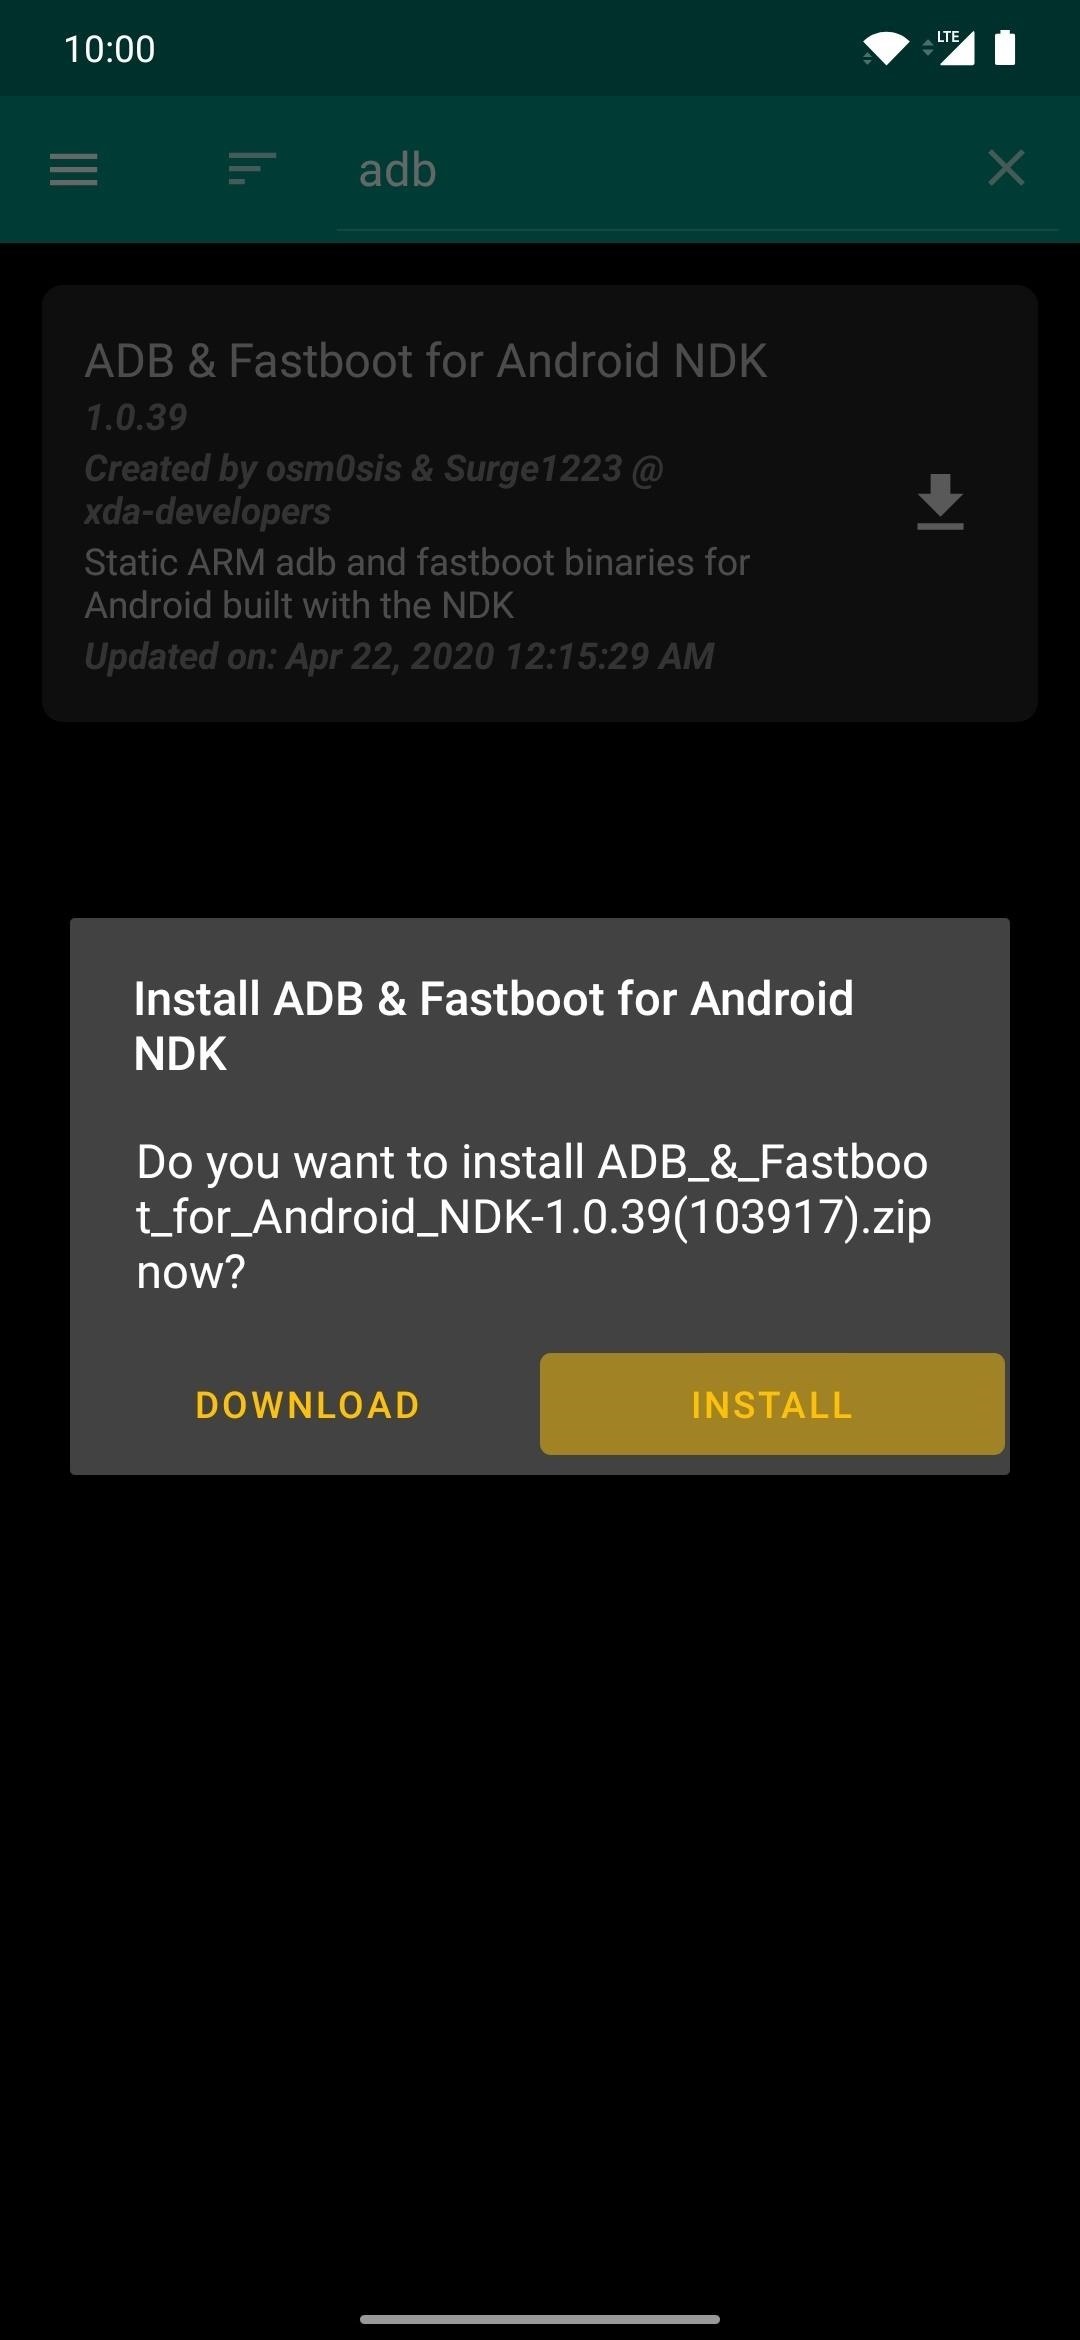
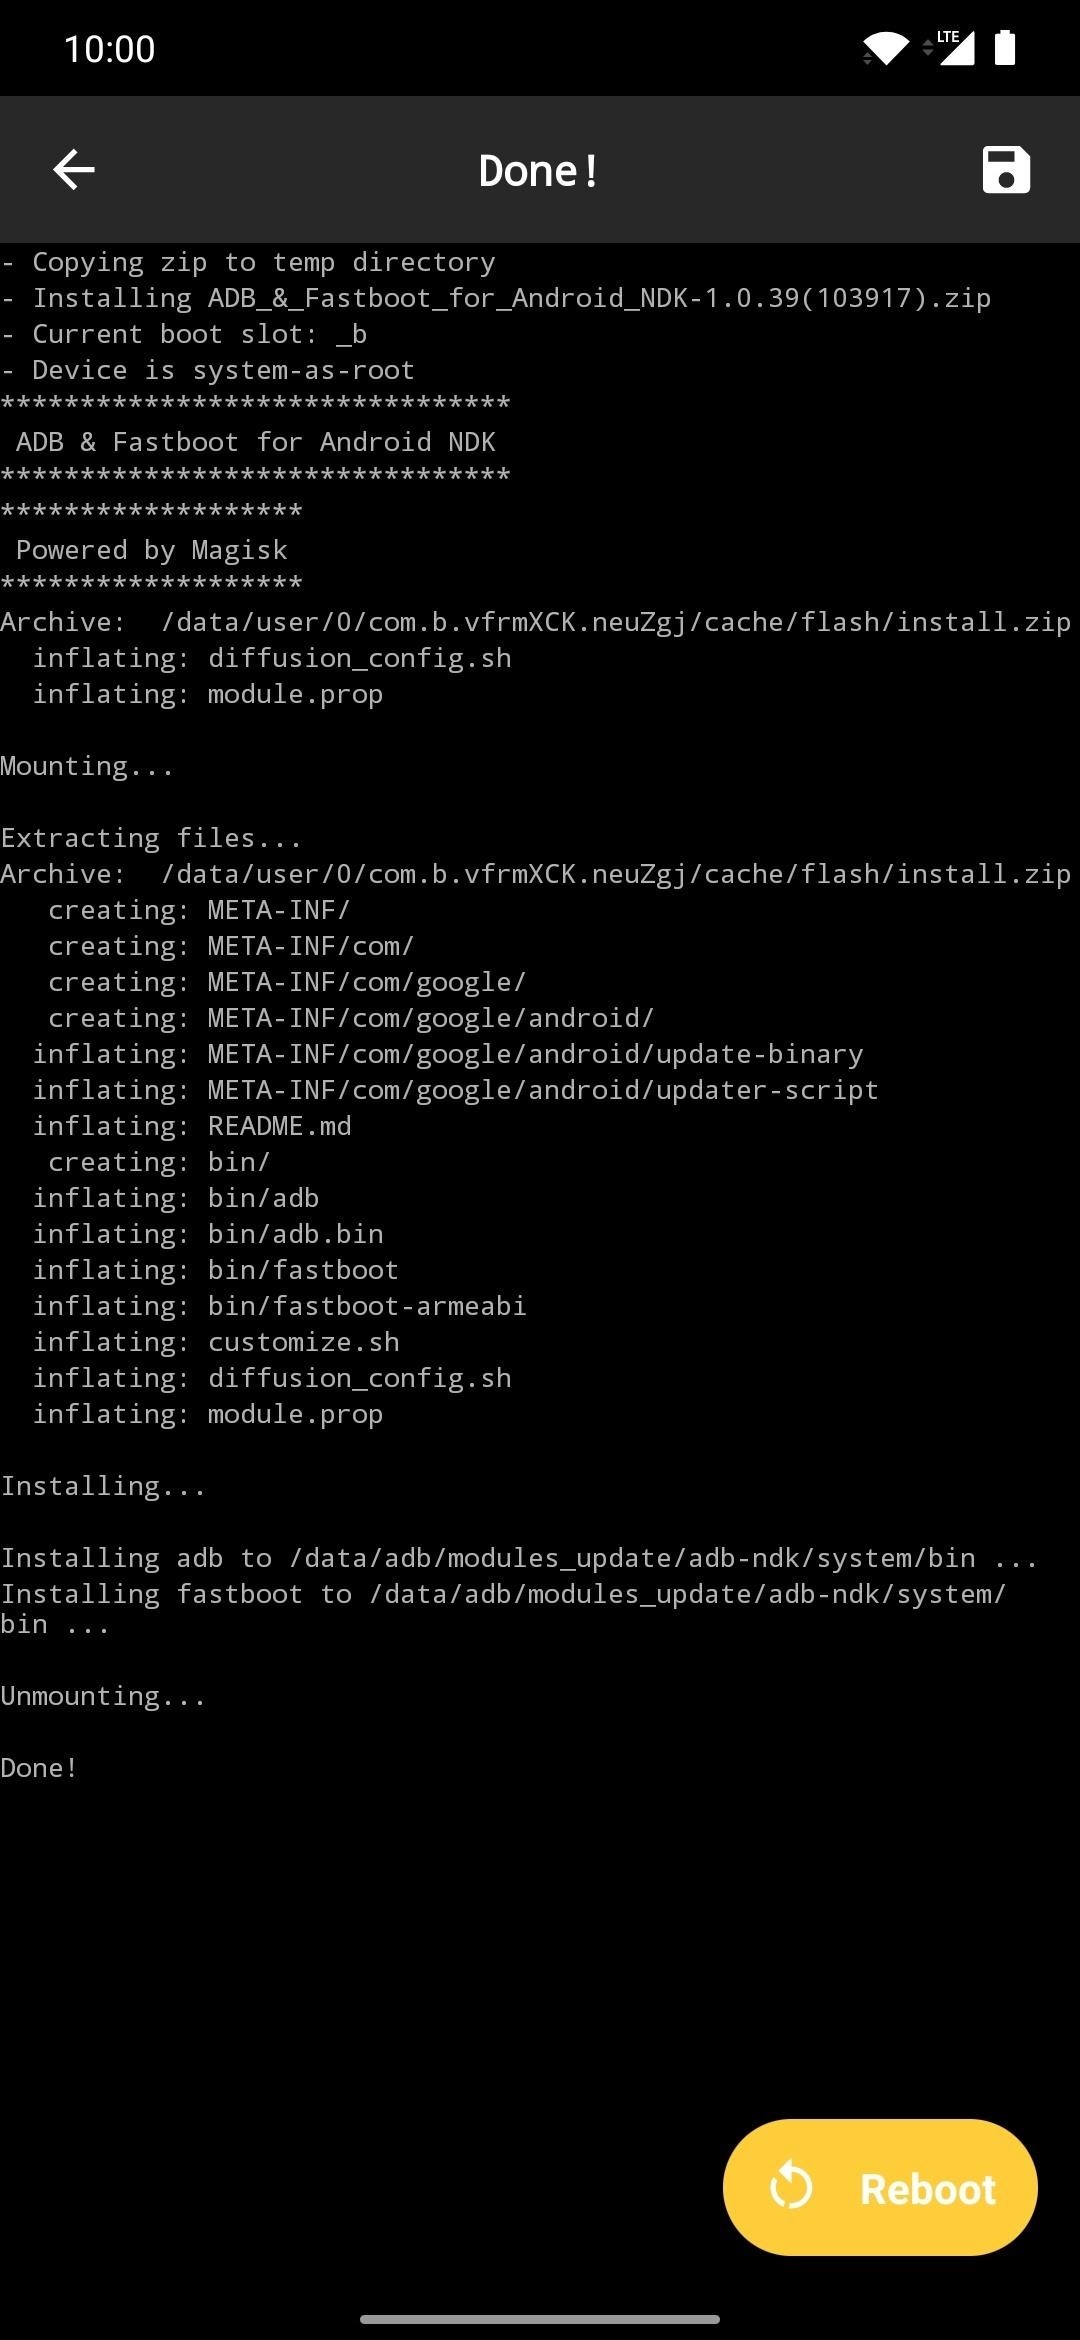
Using the already-rooted Android device, go to Magisk Director, tap the carte du jour on the left, then go to "Downloads." Striking the search icon and type in "adb" to bring up the ADB & Fastboot module y'all'll need for this guide. Press the download pointer, go to "Install," then it'll begin installing onto your device. Once that's done, tap "Reboot" to restart and activate the module.
Footstep 2: Download Your Secondary Device'southward Boot Image
To install Magisk without a computer or TWRP access, you'll be relying on the transmission method of grabbing the kicking image file from a manufactory images packet. Make sure to download the mill images specifically for the version of Android on your secondary device. Information technology'southward also prudent to practice this from the device where Magisk Managing director is already installed.
- Download official factory prototype files: Google | Motorola | OnePlus
Once yous have the factory images parcel, you'll want to extract just the kick.img file from the archive, then discard the rest. For Google and Motorola phones, you tin do this with whatsoever file browser app that supports Goose egg extraction. For OnePlus phones, yous'll need to use a PC tool to extract the boot.img file from the payload.bin file they let you lot to download.
- More than Info: How to Get Fastboot-Flashable Paradigm Files for Whatsoever OnePlus Phone
Footstep 3: Patch the Boot Image with Magisk
Now it's fourth dimension to take the factory image file y'all downloaded for your secondary device and extract its contents. Once more, make sure y'all're doing this step on your already-rooted device and so you can patch the file to achieve root admission. Follow the few quick instructions below, and you'll have your patched boot paradigm file in no time.
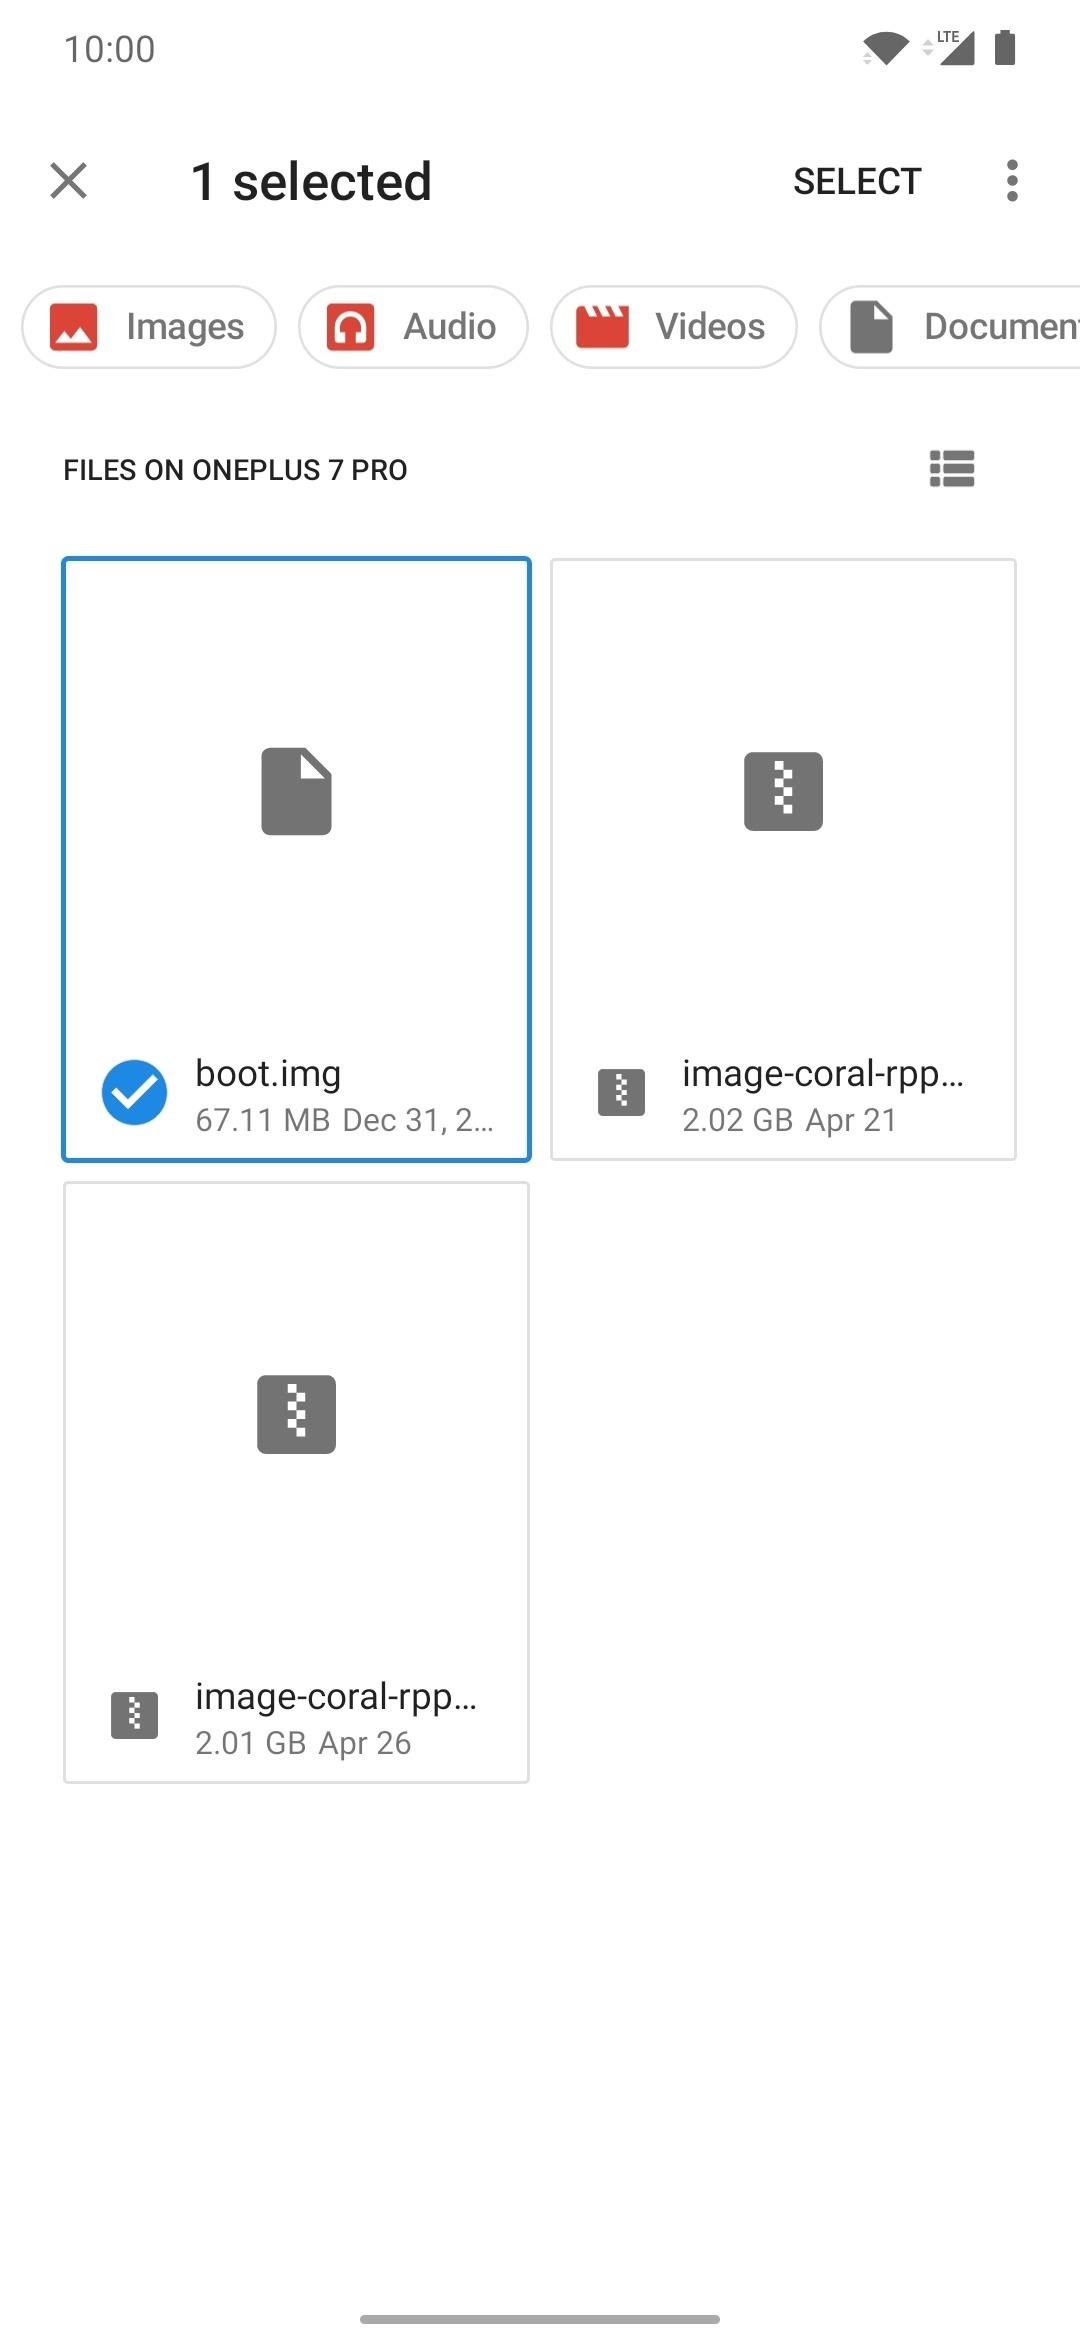
- Locate the "boot.img" file you extracted in Step 2 and move information technology to the "Download" binder.
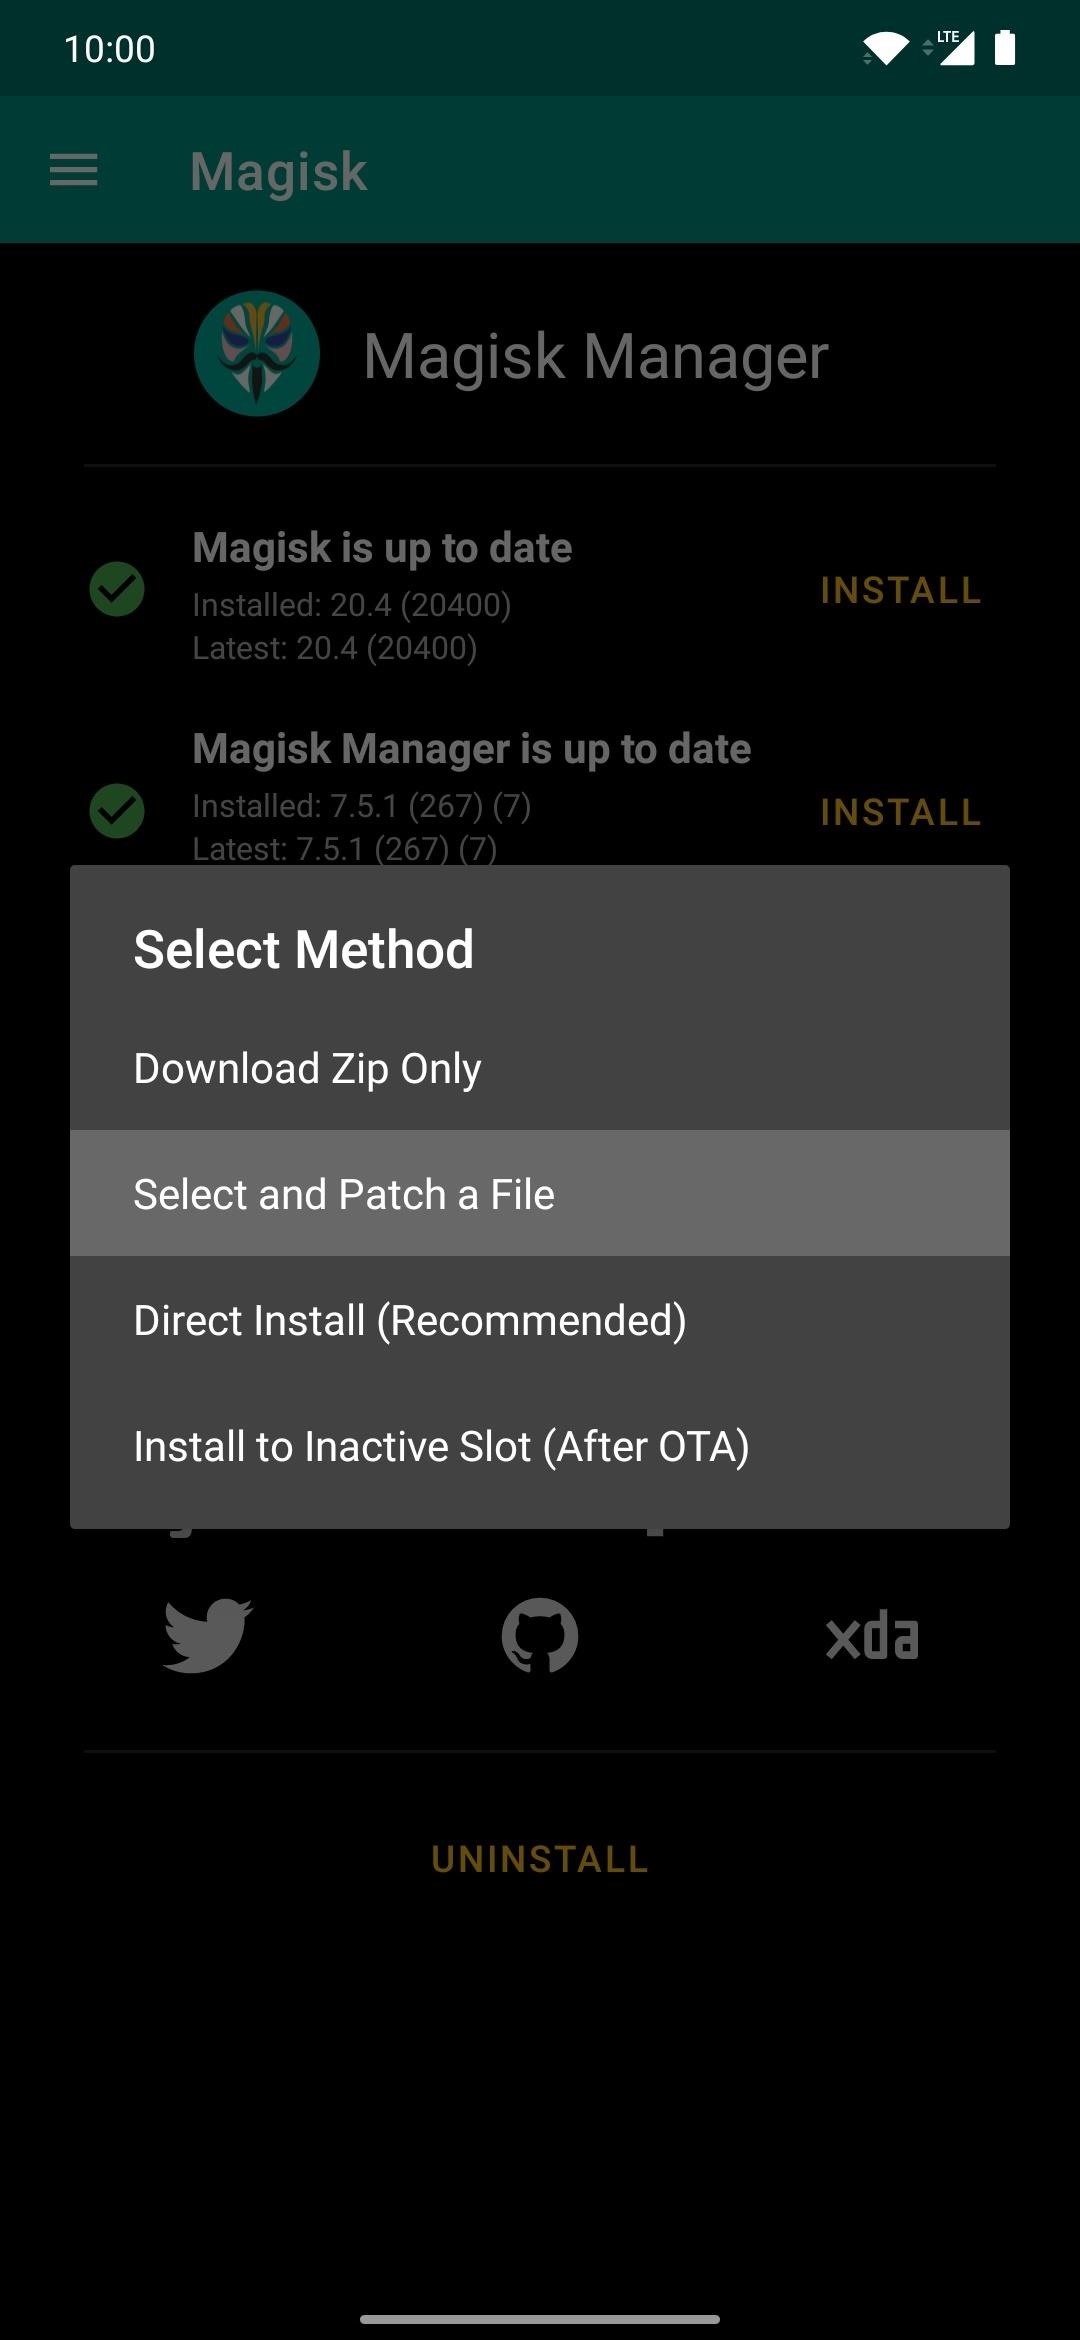
- In Magisk Manager, tap "Install" next to "Magisk is upward to engagement."
- Tap "Install" on the popup.
- Choose "Select and Patch a File."
- Utilize the file picker to select the boot.img file in the "Download" folder.
- Tap the dorsum arrow and exit Magisk Managing director when finished.
Step iv: Install the Termux App
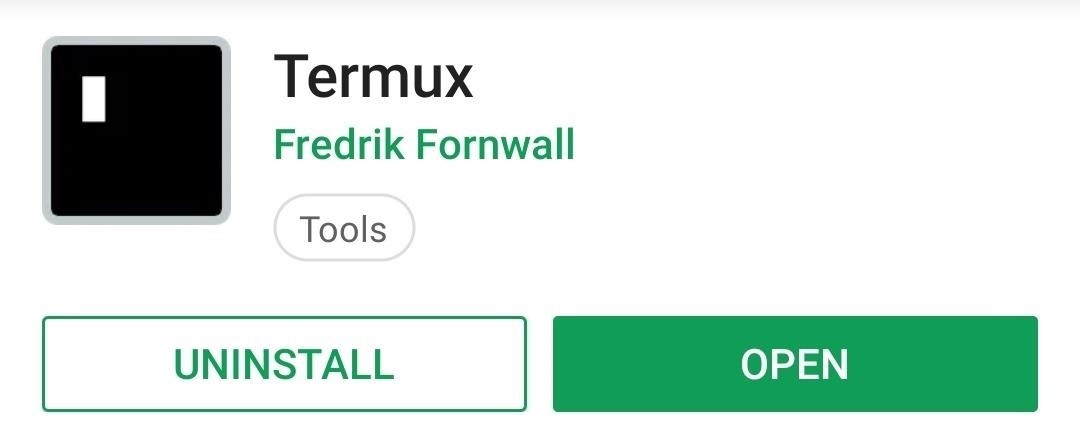
To use ADB and Fastboot commands on Android, you'll need a concluding app on your rooted device so you can send the Magisk file over to your secondary device. Easily one of the best last apps on Android, Termux has everything you lot need and more. Hit upwards the link beneath on your rooted device to go Termux.
- Play Store Link: Termux (free)
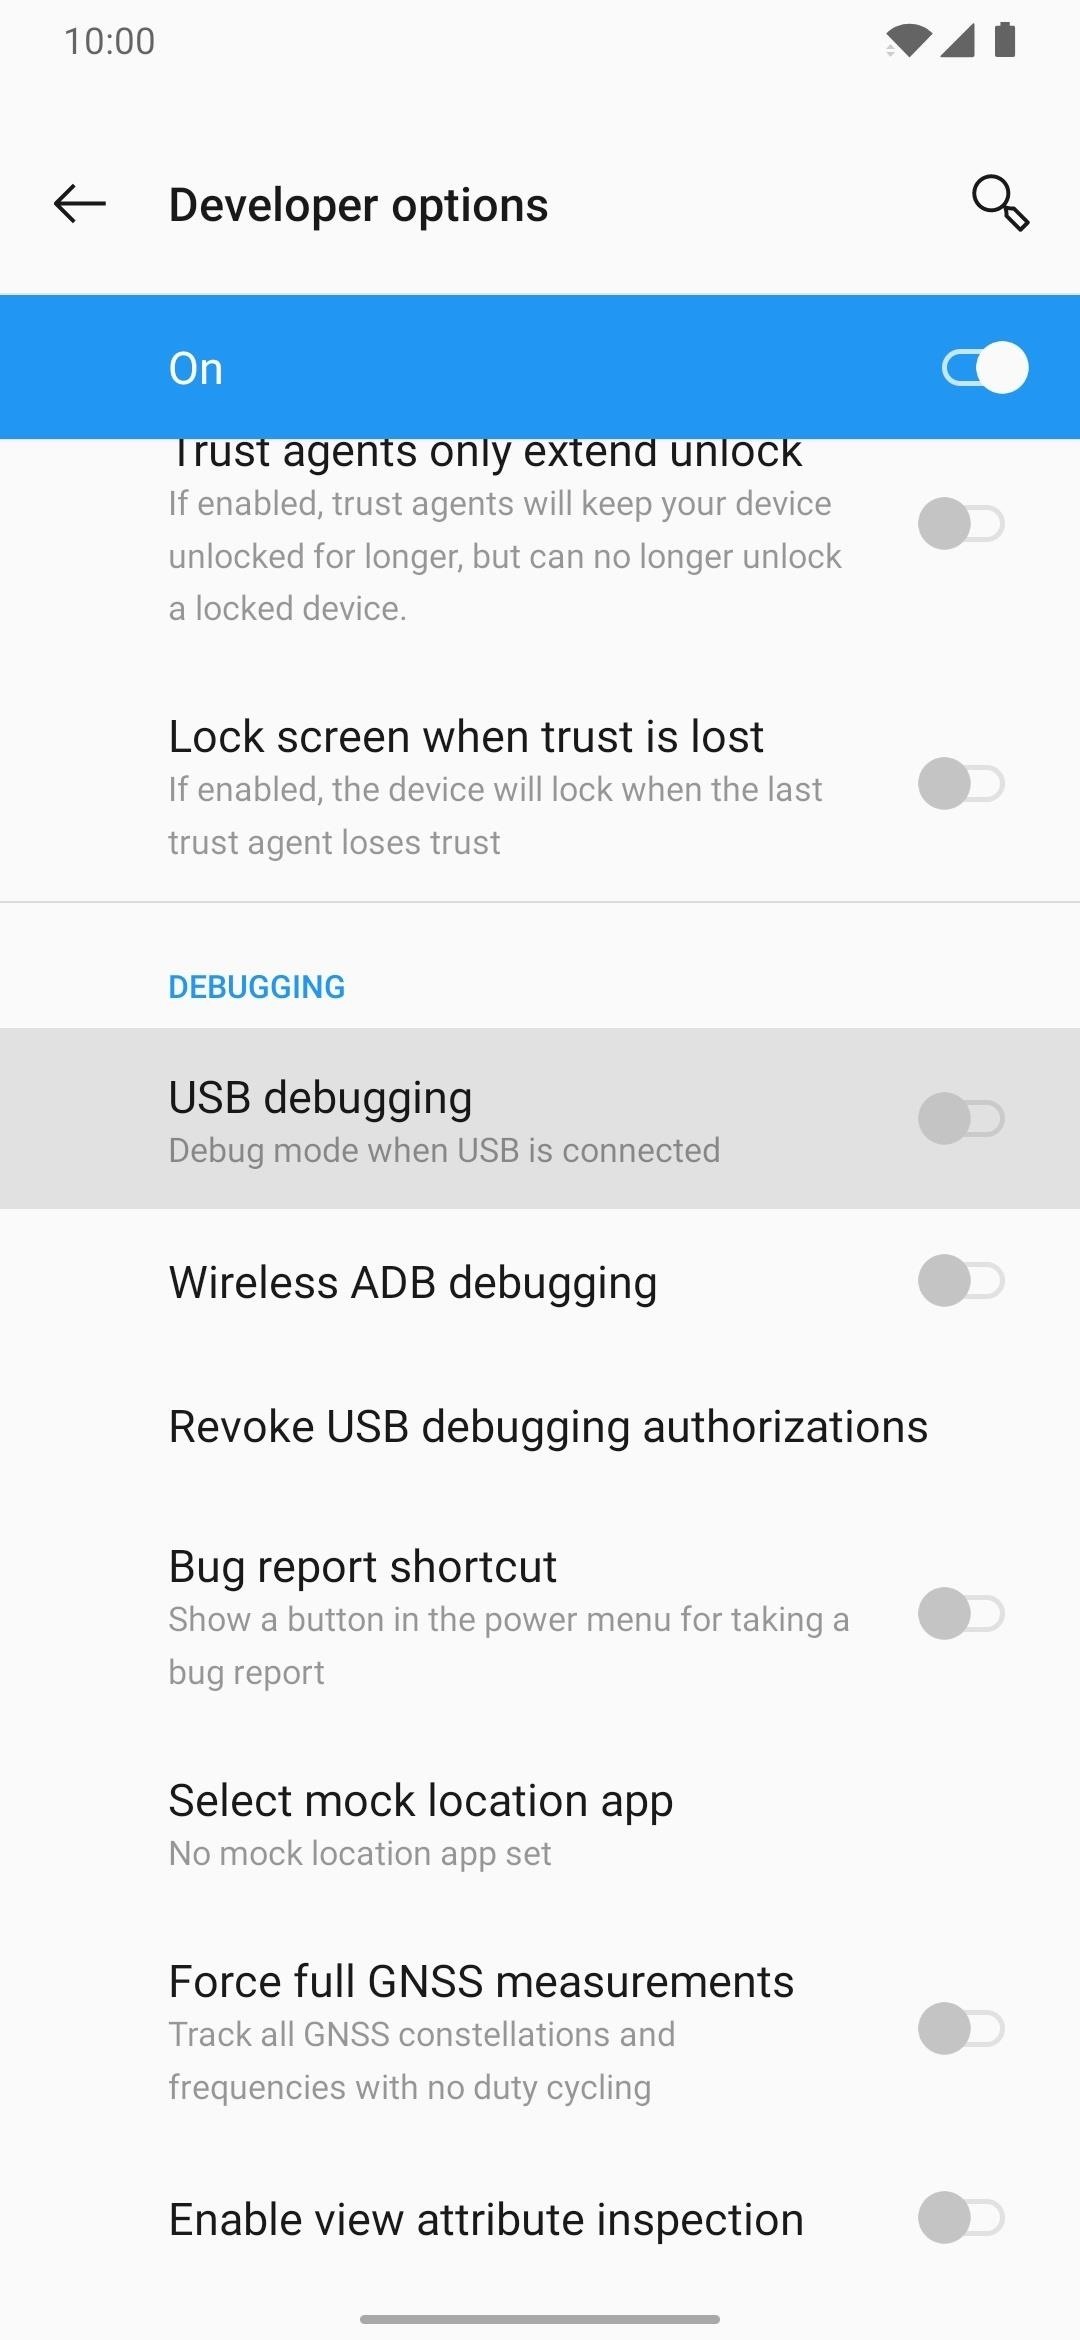
Step 5: Enable USB Debugging
For this footstep, caput over to your secondary device to enable the Developer Options and turn on USB Debugging. Doing this will let your two Android devices to communicate with 1 another over a USB connection. This procedure is generally the same no matter what version of Android you have, but you tin hit up the guide below if you need more help with this function.
- More Info: How to Enable Developer Options & USB Debugging
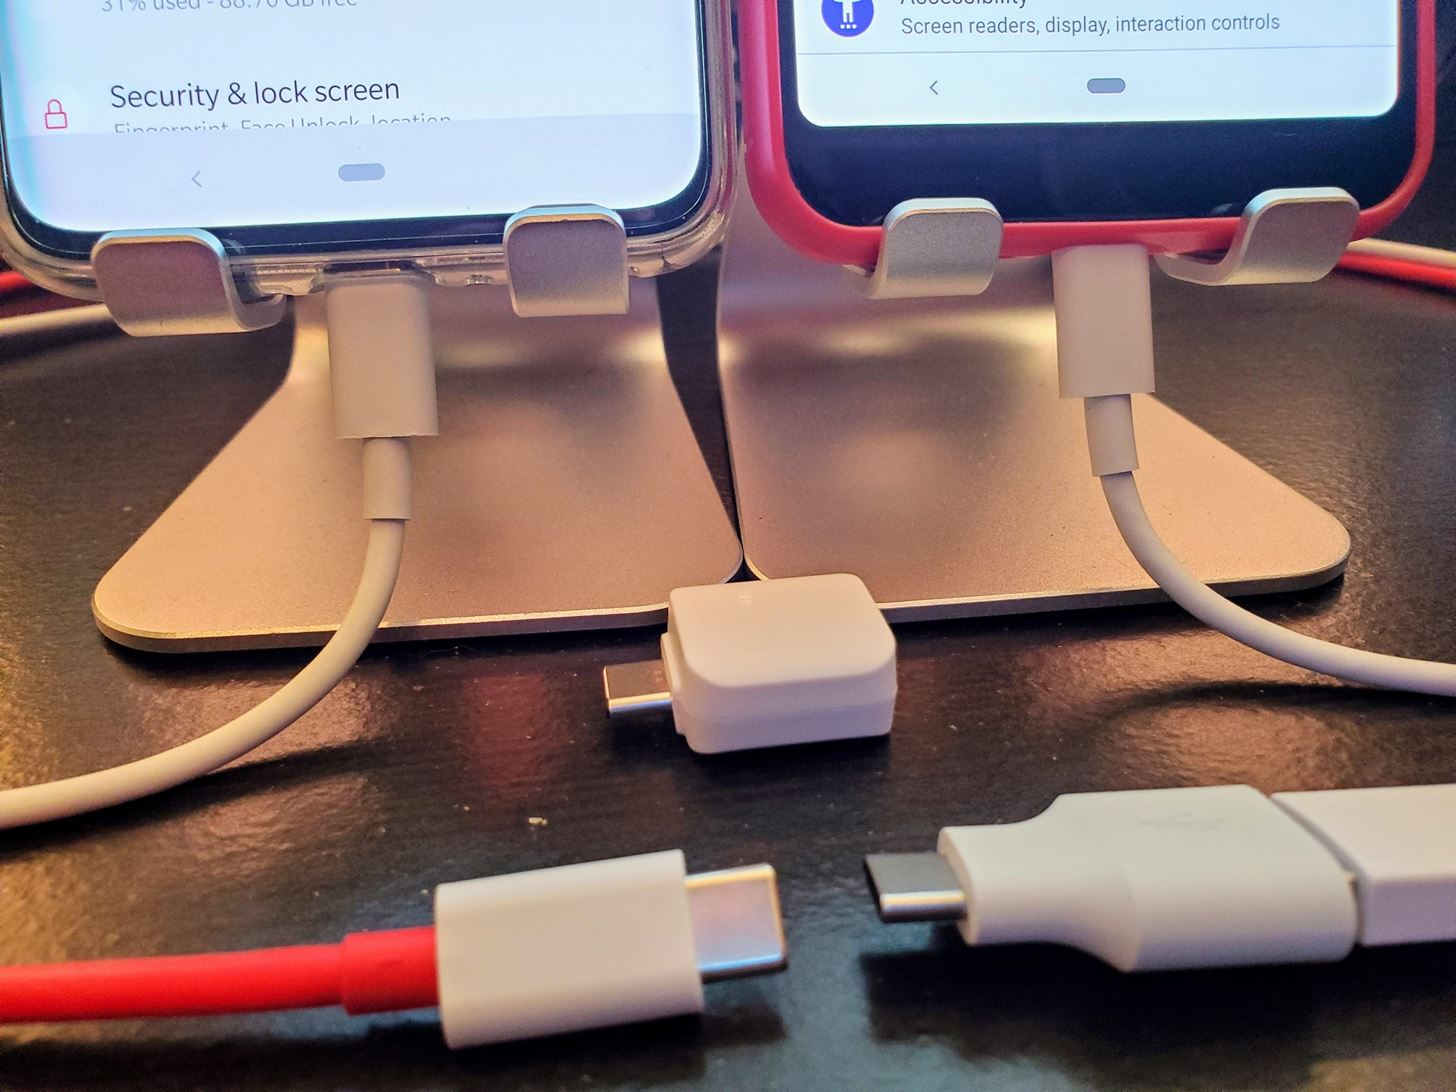
Step 6: Connect the 2 Android Devices
With all the dissimilar manufactures and versions of Android, sometimes it can be confusing as to what accessories you might need in certain situations. To help you out here, you can apace determine what cables or adapters yous need based upon what your secondary device uses. That makes things quite simple. If you lot demand any of these accessories, you can grab them from the Amazon links below.
- Buy a USB Type-C OTG adapter from Amazon (from $iii.50)
- Buy a Micro USB OTG adapter from Amazon (from $4.20)
- Buy a USB A to USB C cable from Amazon (from $5.99)
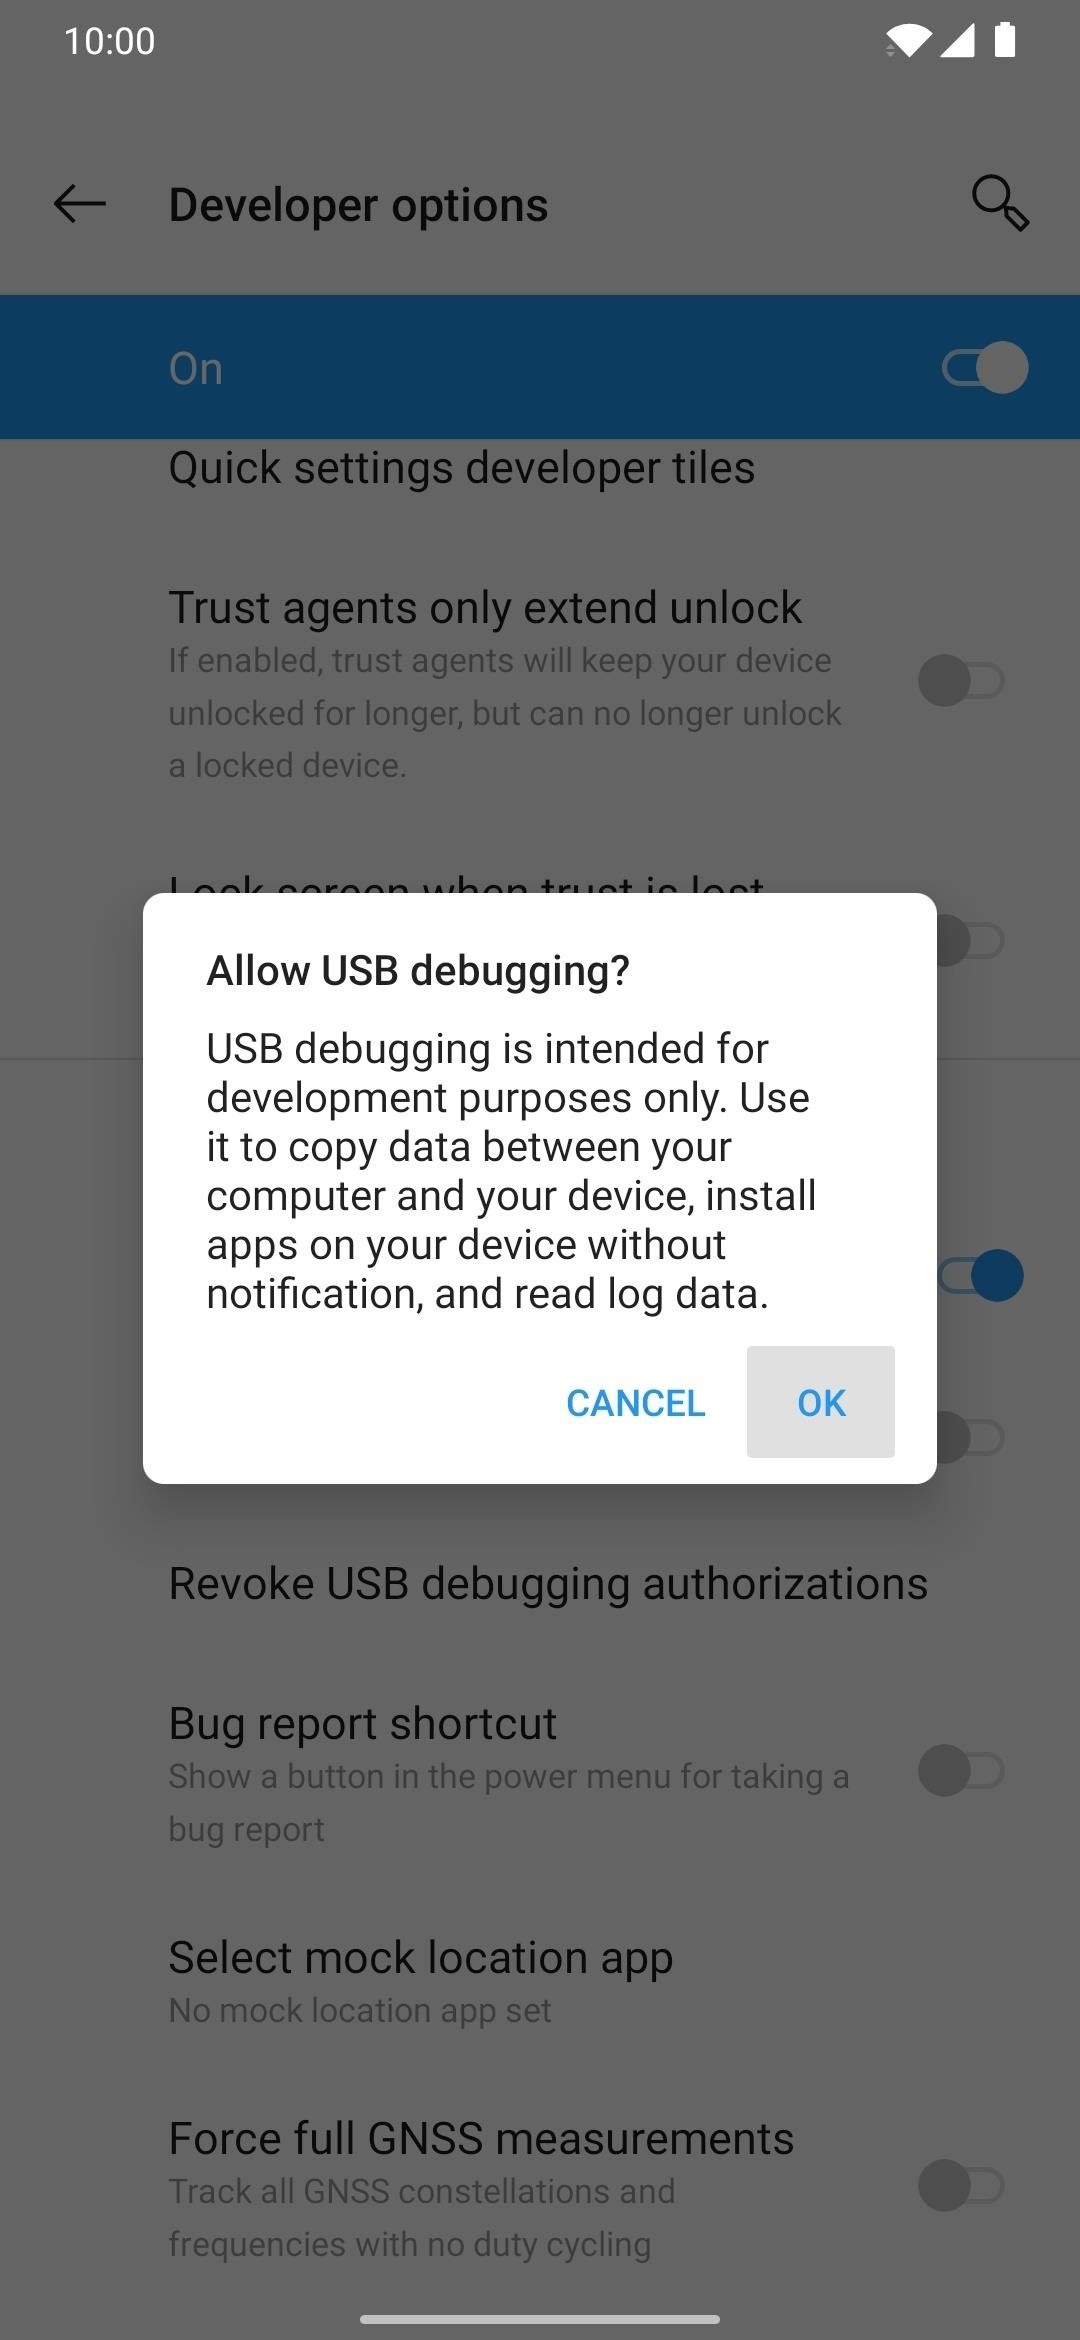
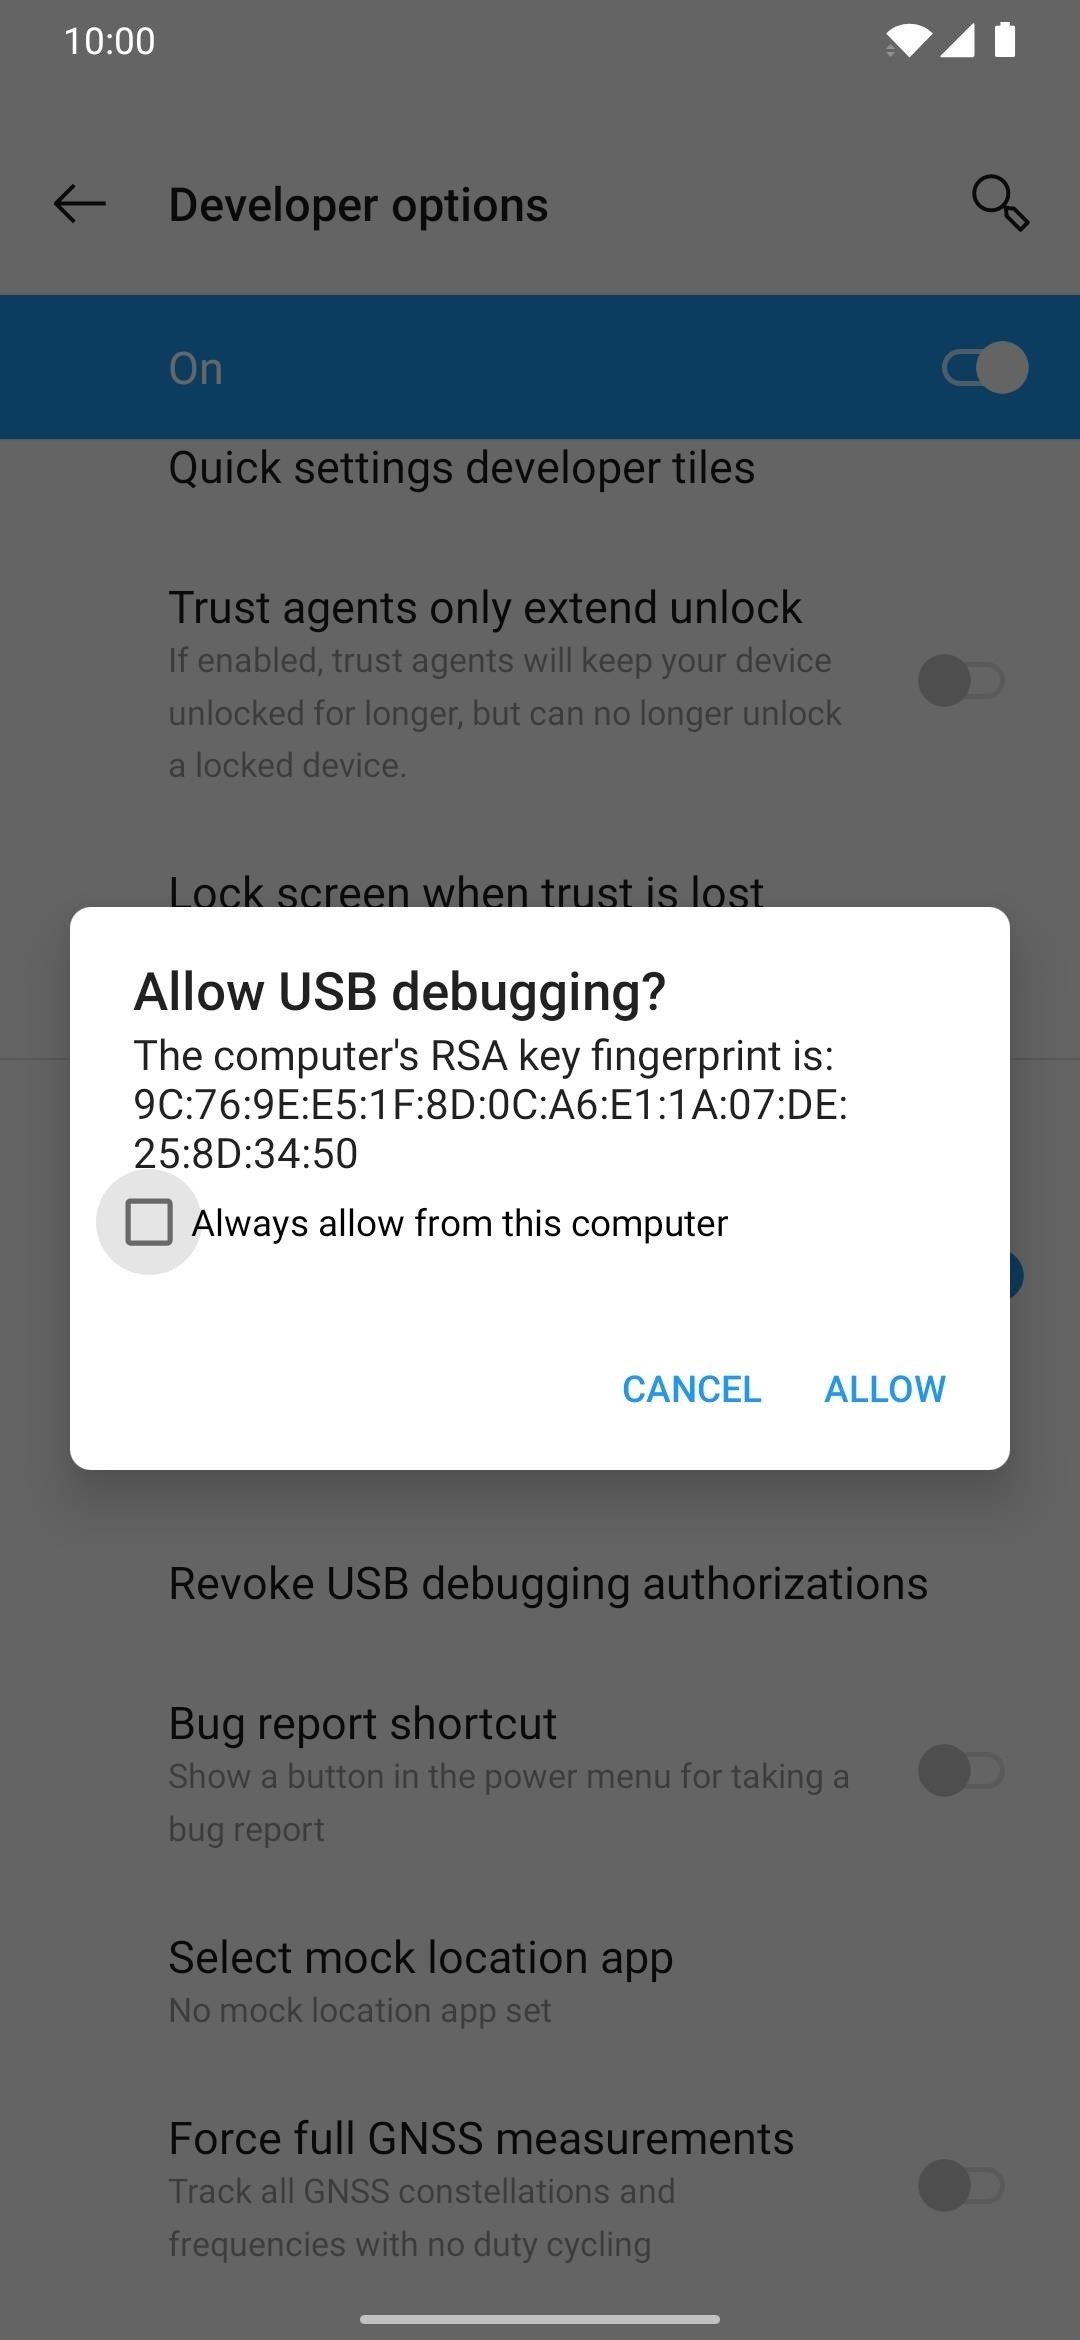
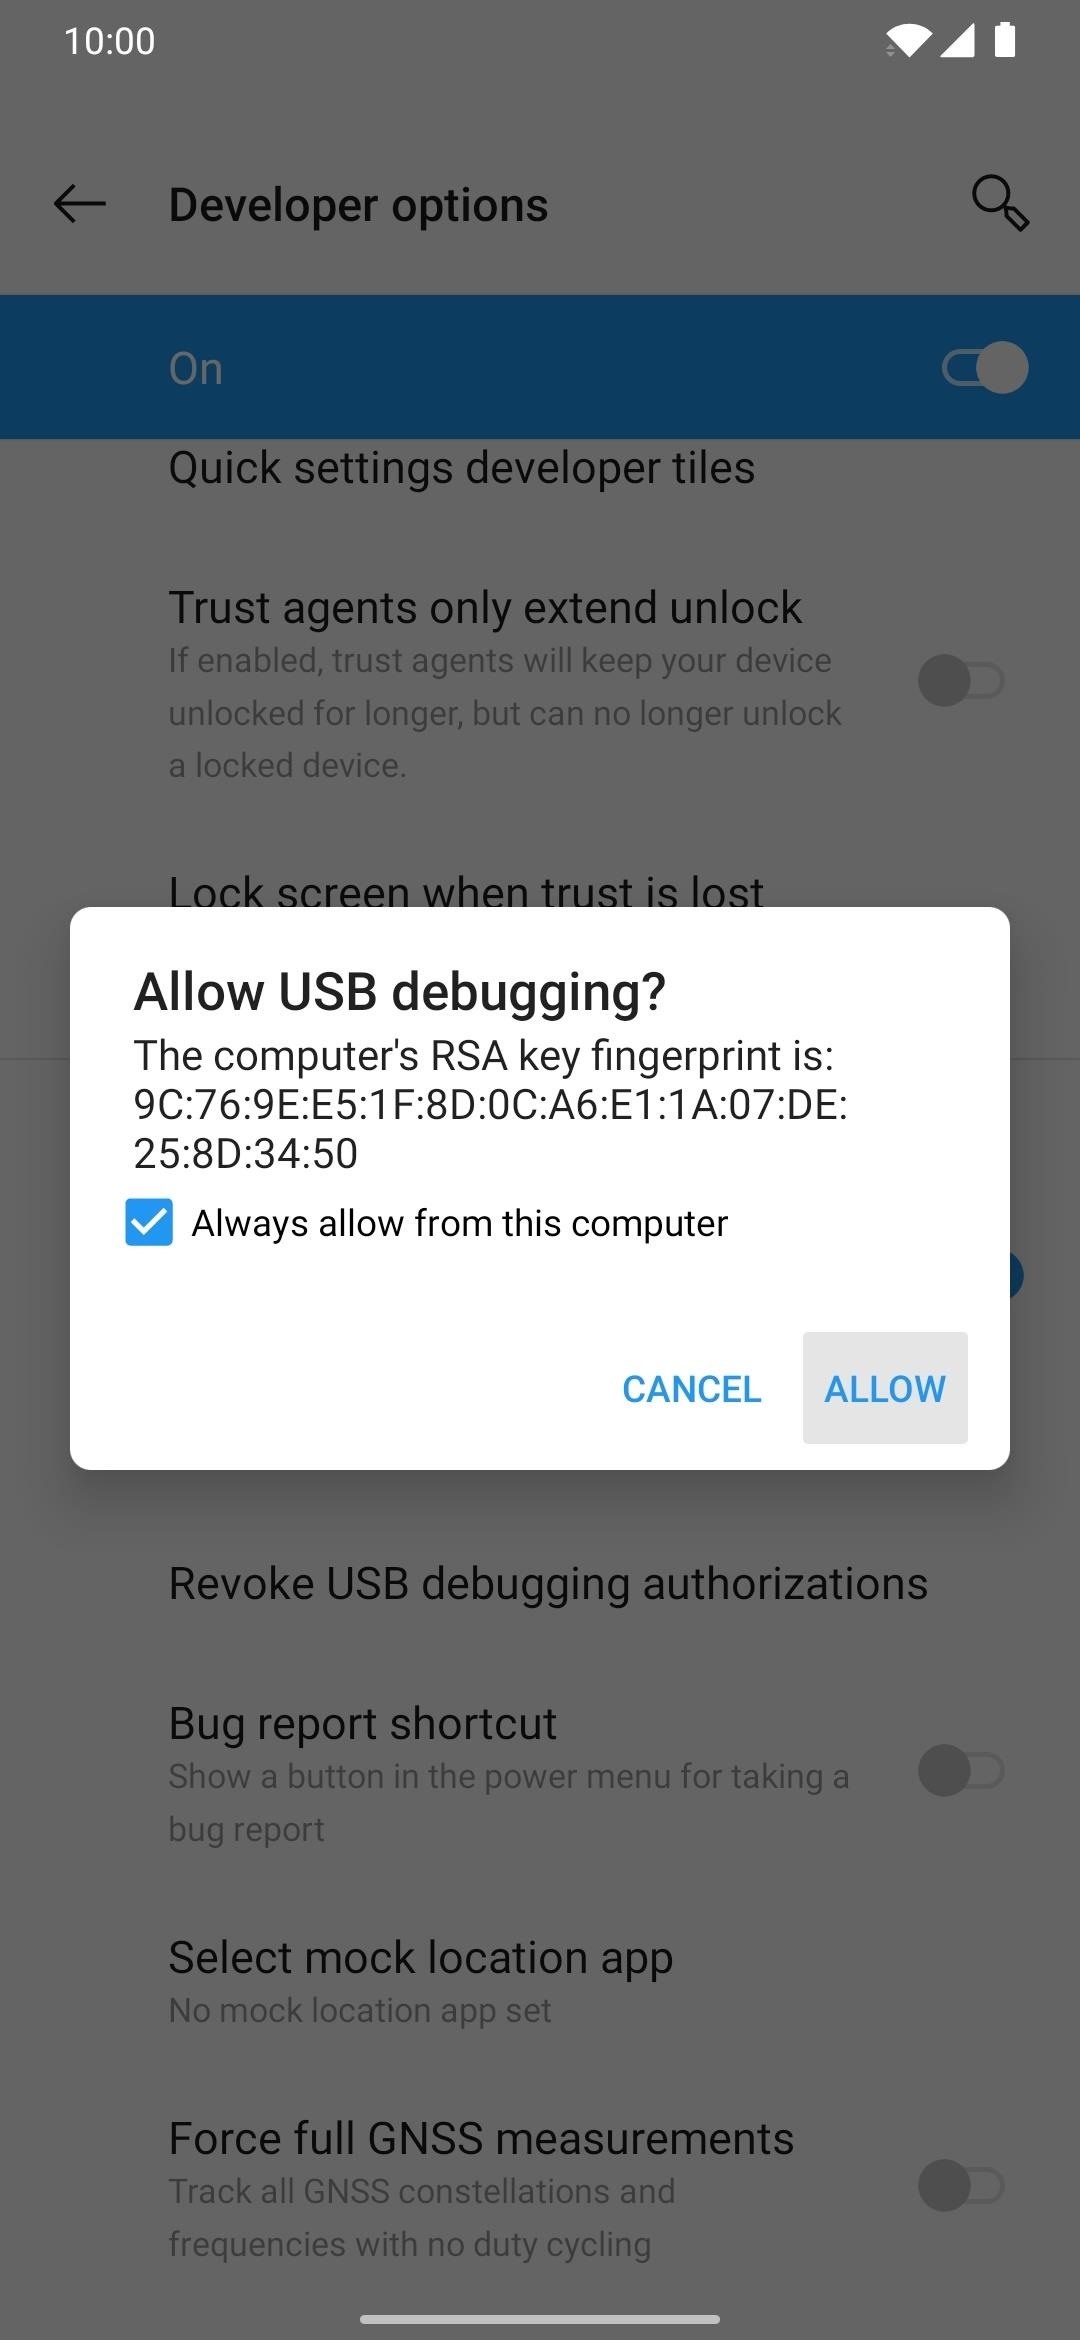
Step 7: Let USB Debugging
Now that your two devices are connected via USB, you'll need to enable the USB debugging permission to grant access to your secondary device. A popup should appear right away once you connect the devices, merely if not, remove and reconnect the USB cable from the secondary device to try information technology once more. Now, tap "Always let from this figurer," followed by "OK" to confirm the choice.
Footstep 8: Grant Root Access
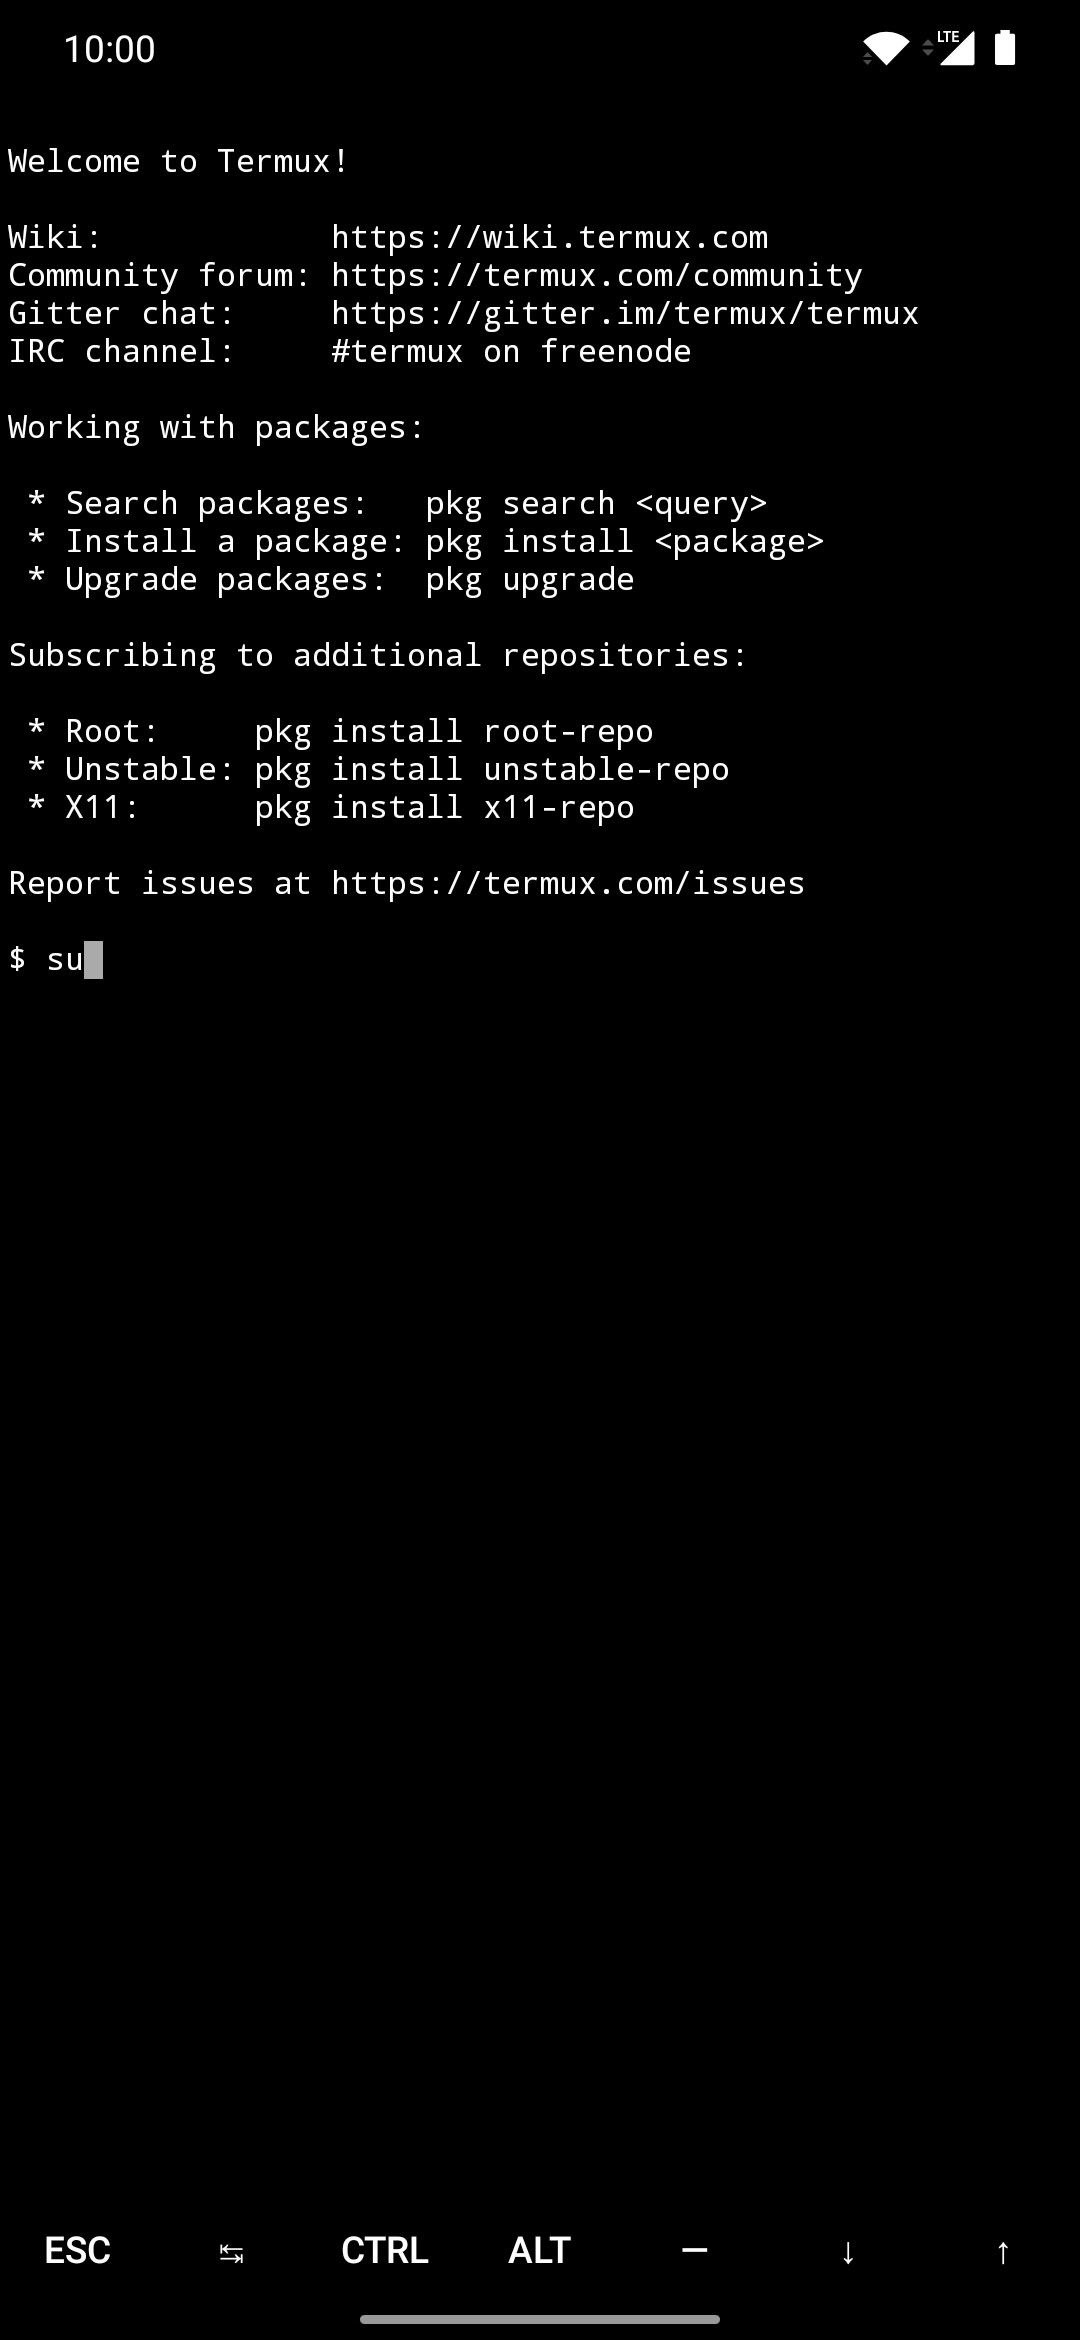
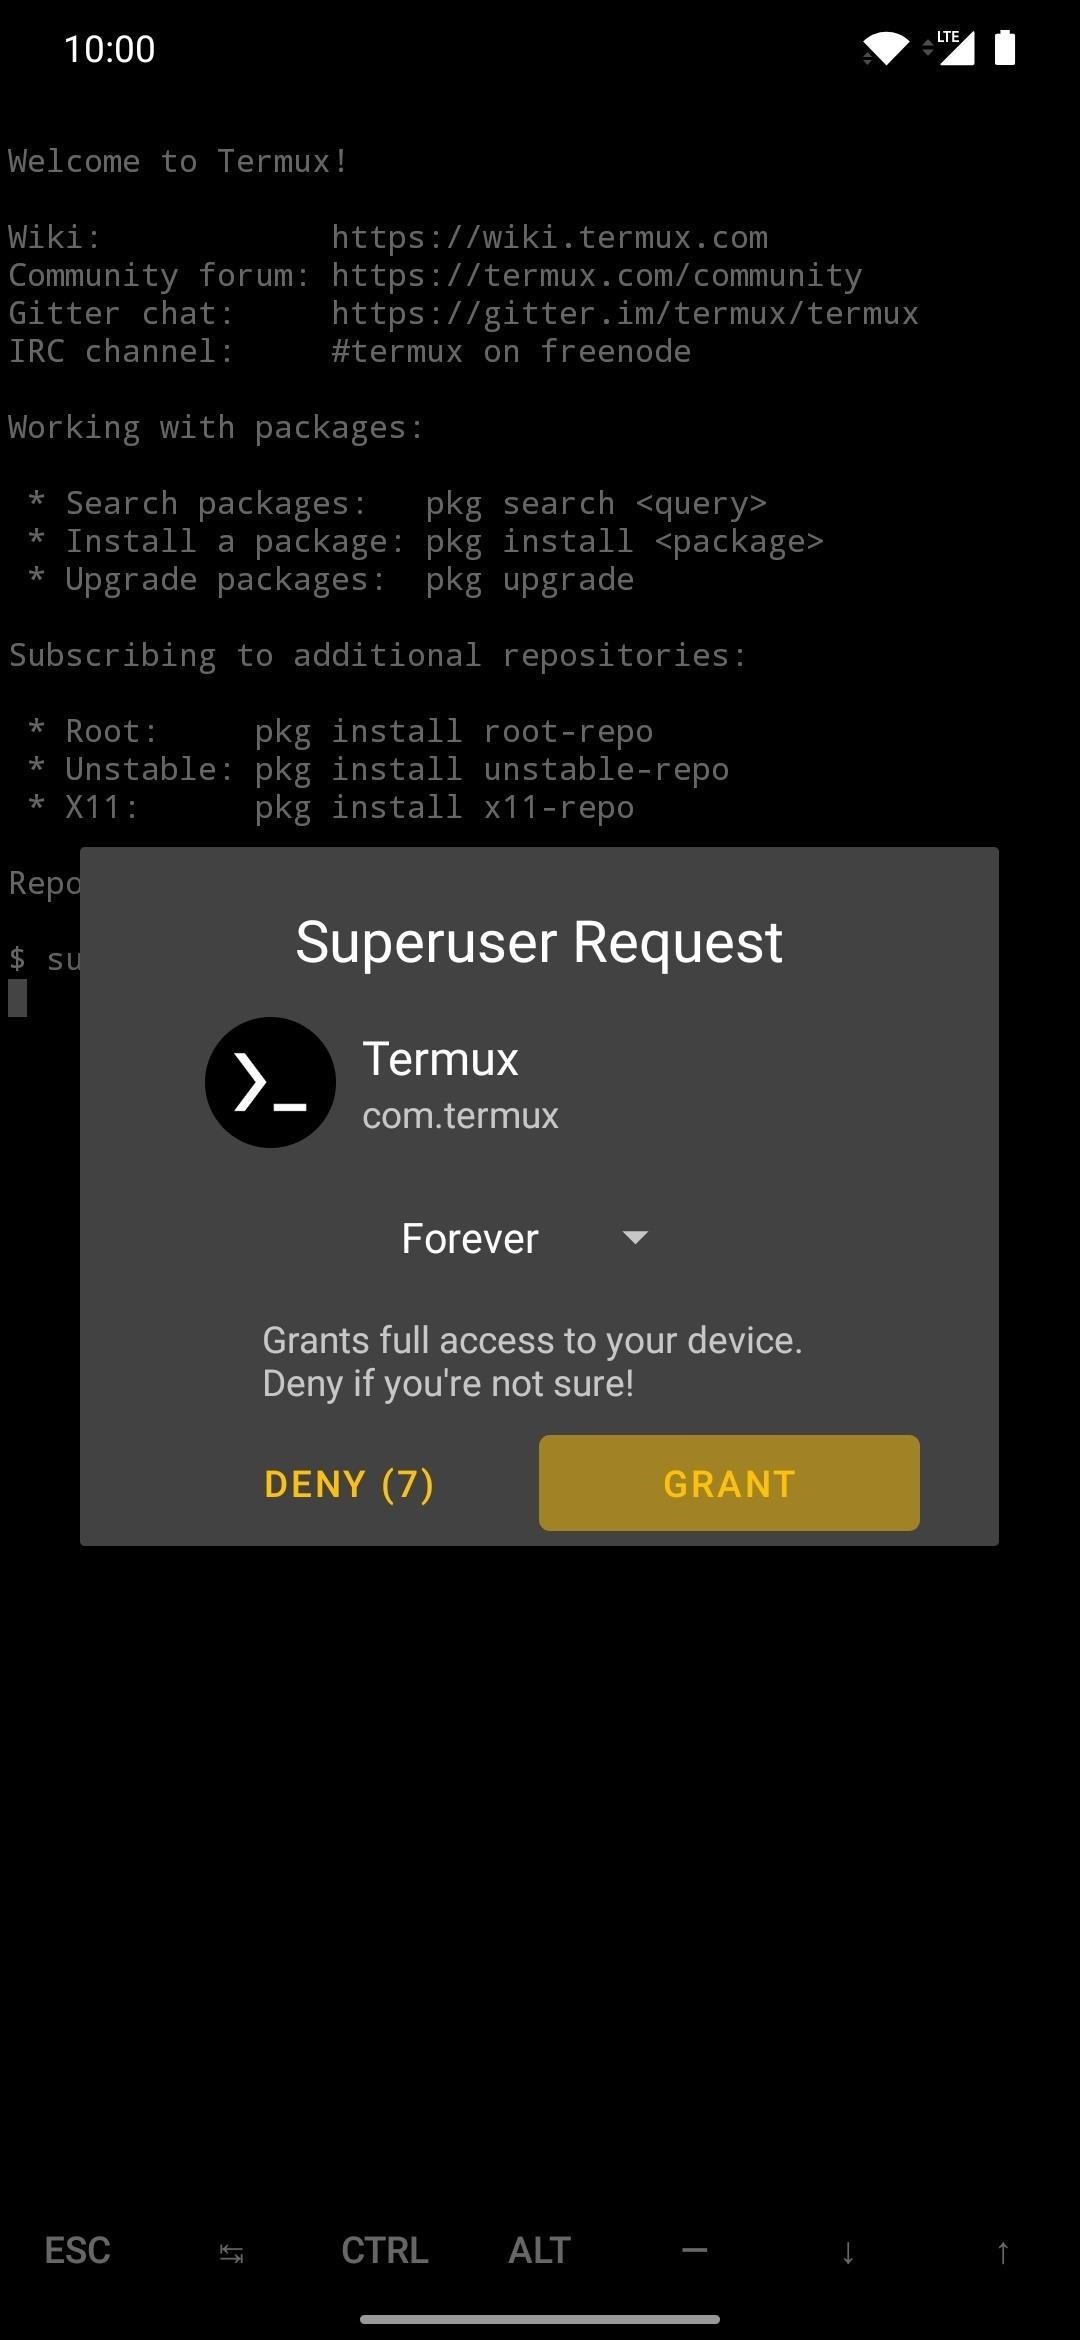
This part is quick, simply it'south crucial just the same. You'll need to grant root access to Termux and so yous can send off the commands required to install Magisk onto your secondary device. On the already-rooted device, open the Termux app, type the post-obit command, then press enter.
su This will trigger a superuser asking from Magisk and is always required when executing higher-level system commands. Y'all'll be required to type in the "su" command each fourth dimension, just you won't have to grant access to the superuser request again, though.

Footstep 9: Verify Your Device Connection
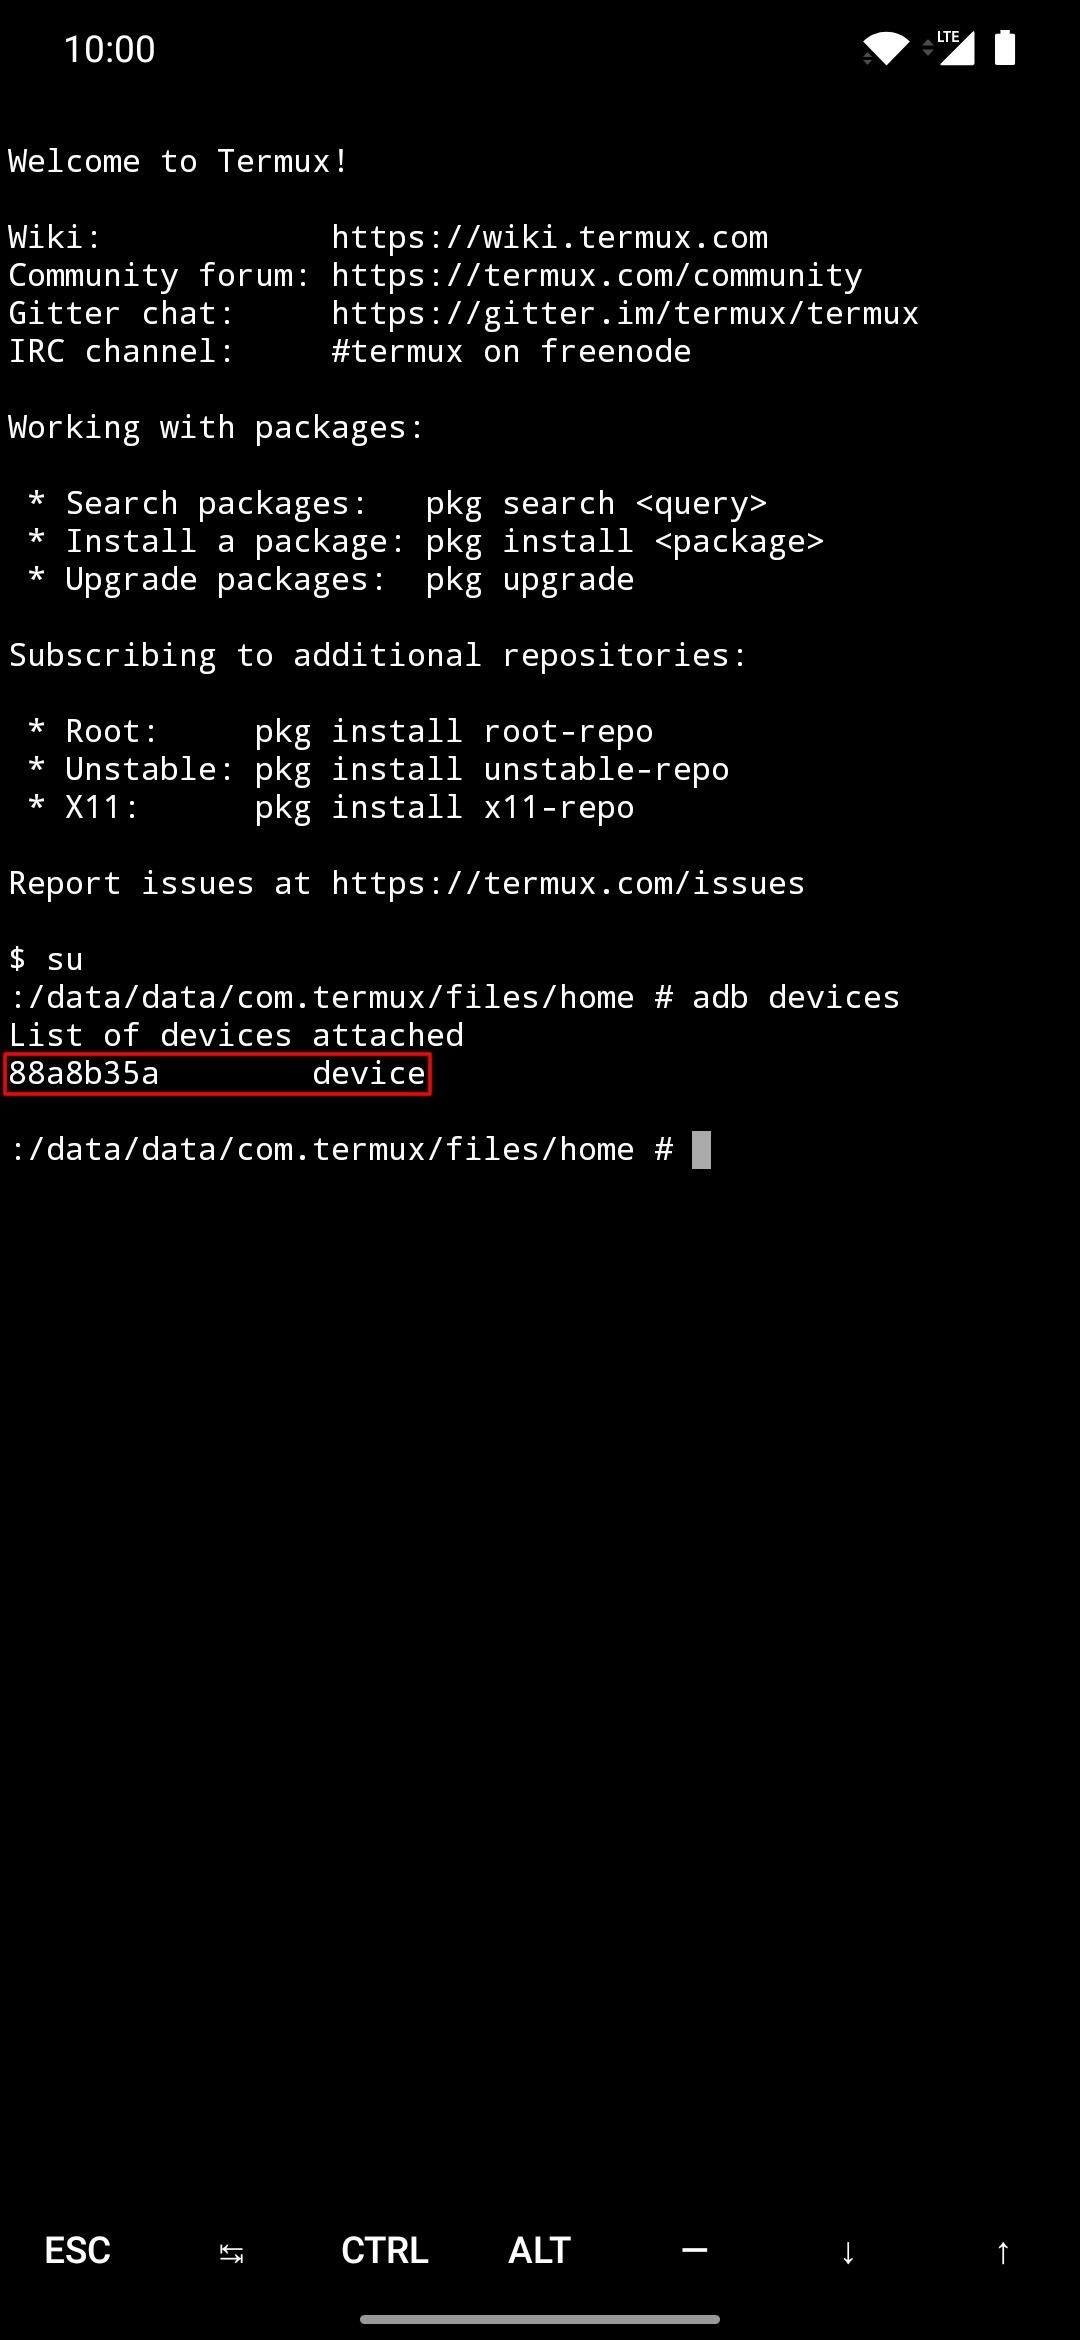
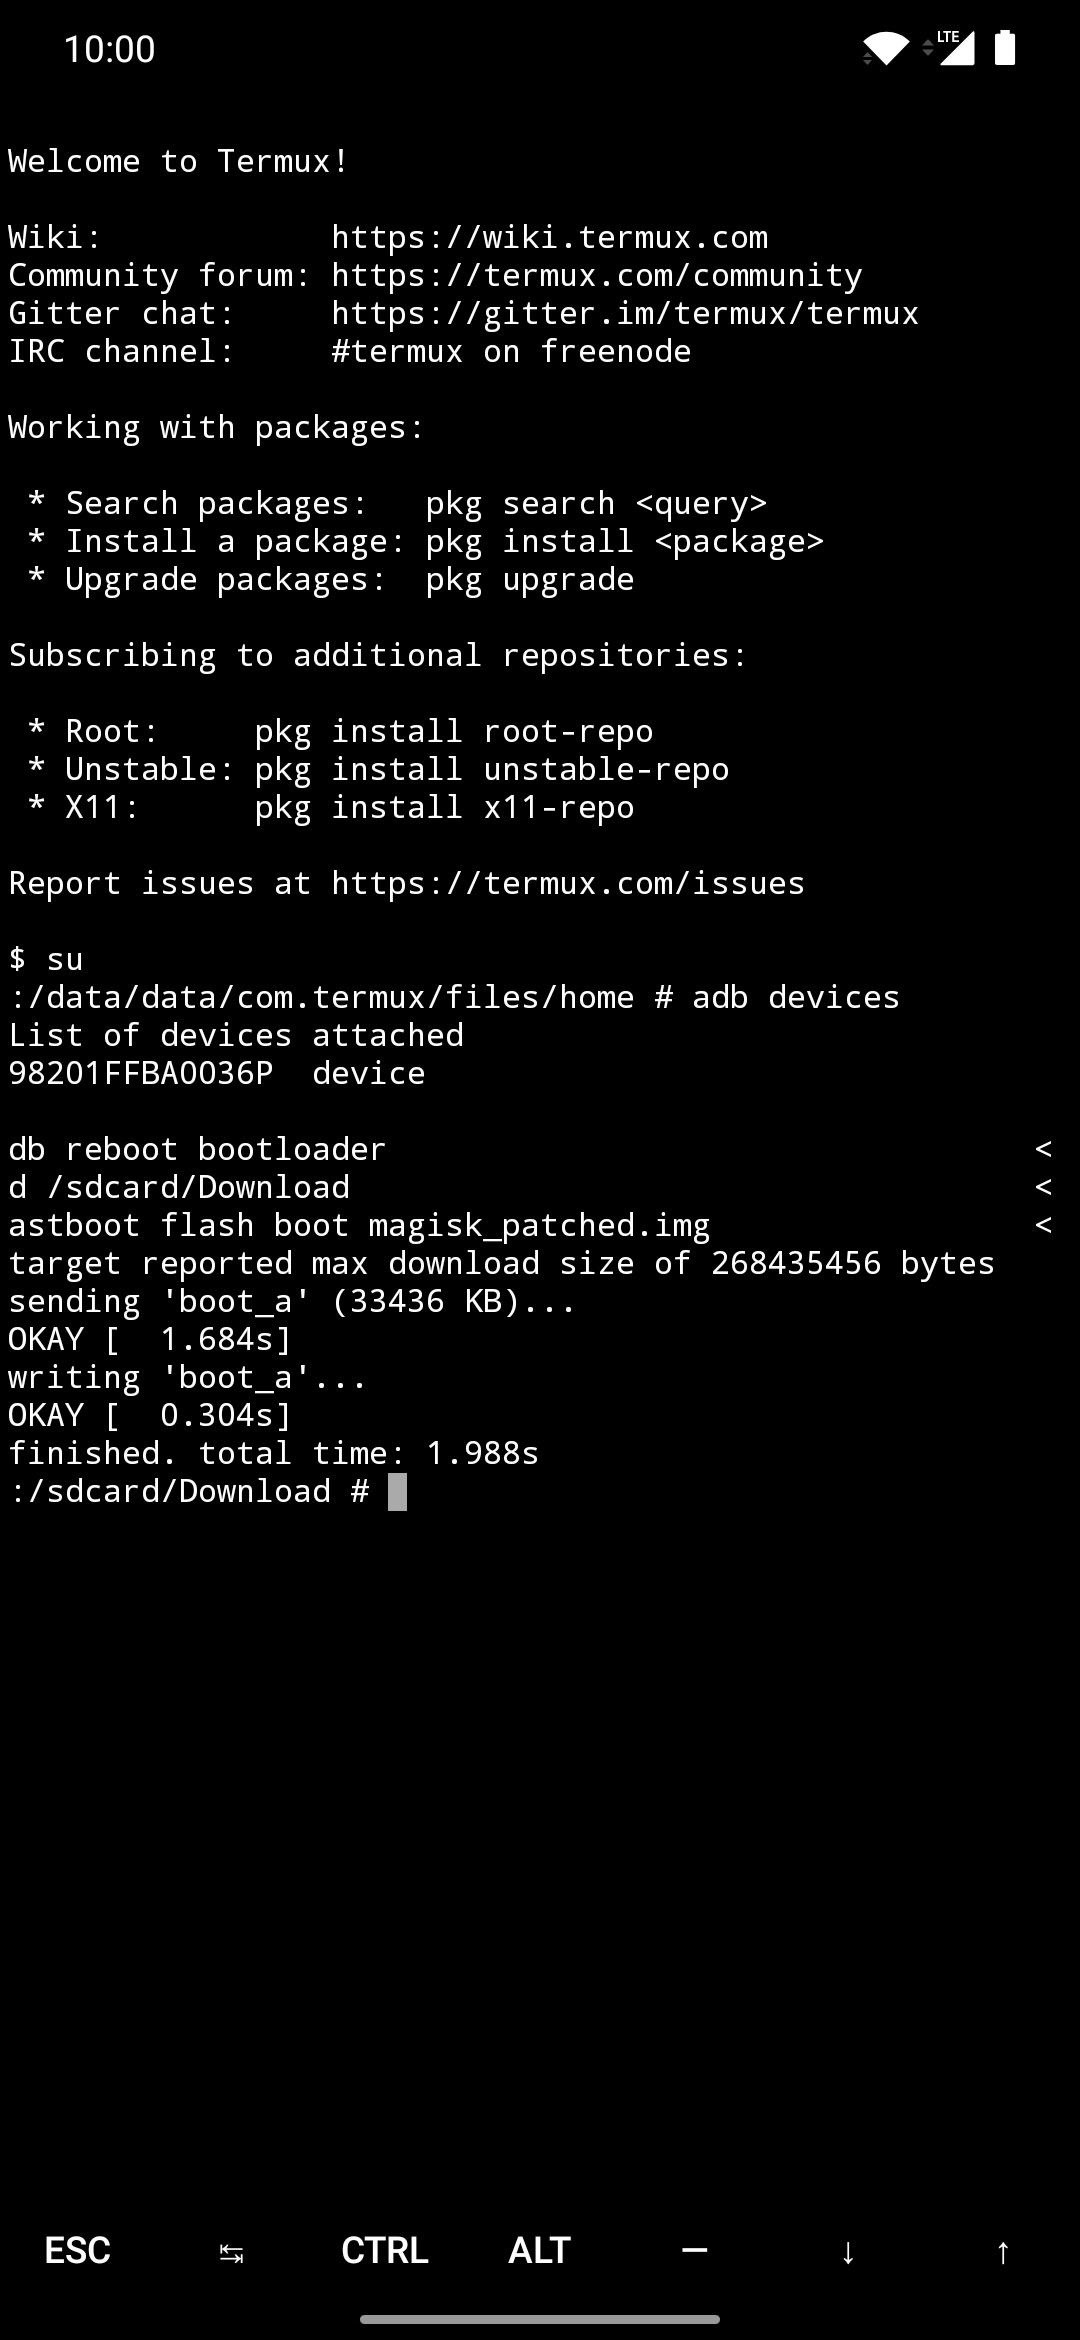
Once you lot've granted superuser access to Termux, you'll want to make sure the two devices are actually communicating with one another properly. To double-check this before continuing with the guide, blazon the following control on the rooted device through Termux, then press enter.
adb devices If everything checks out afterwards you enter the above command, the "List of devices attached" line should generate a unique ID specific to your continued device.

Step 10: Boot into Fastboot Mode
Now you'll need to put your secondary device into Fastboot Mode before y'all tin can do anything else after this indicate. You'll ever demand to put the device in this fashion whenever yous want to execute Fastboot commands of any kind.
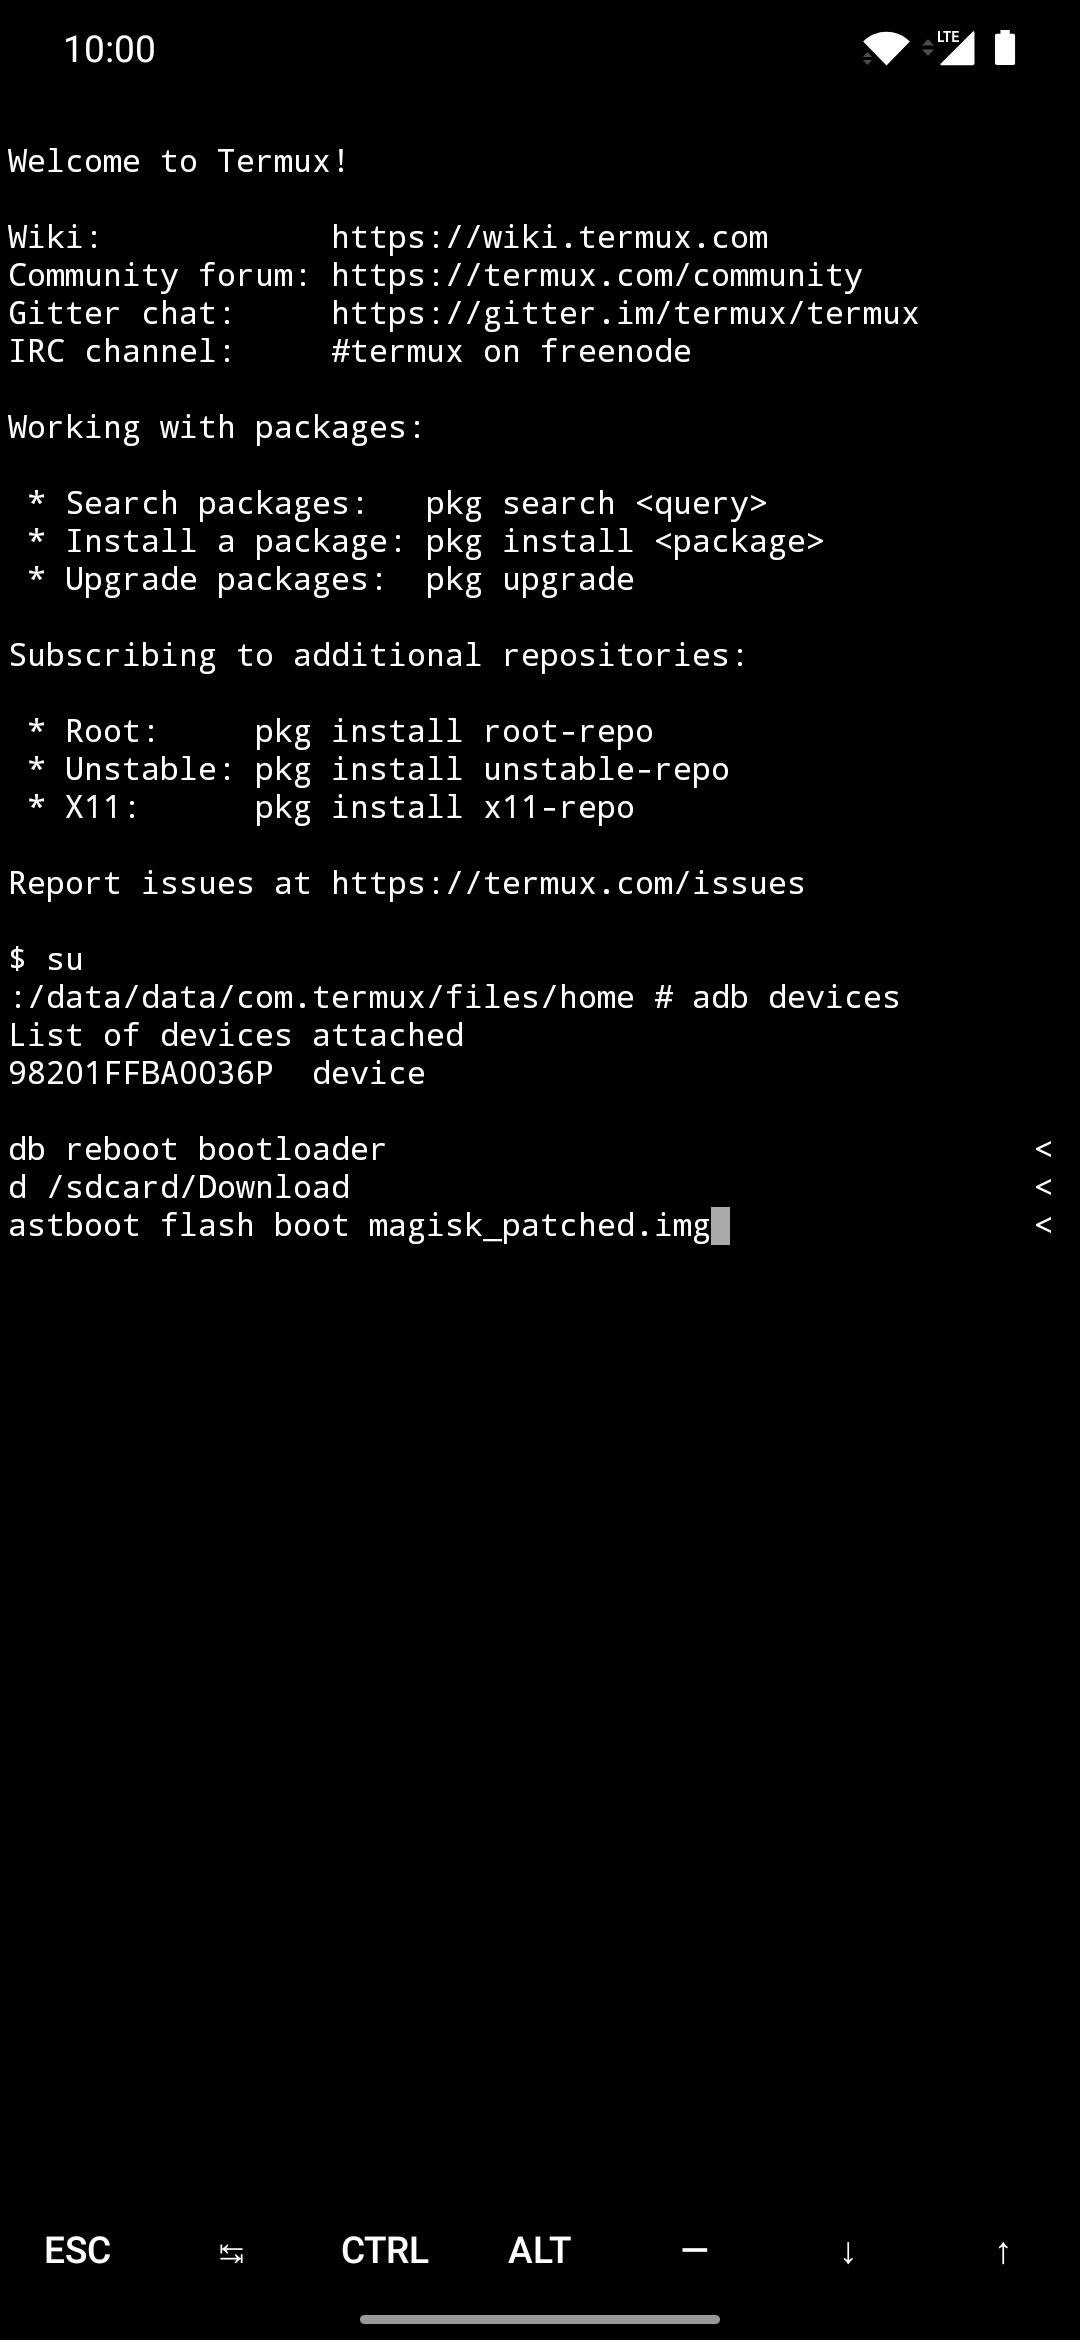
adb reboot bootloader The command here volition tell the secondary device to reboot into its bootloader menu, which is often referred to as "Fastboot Style."
Step xi: Locate the Magisk File
From here, you need to tell Termux where exactly the Magisk file is located and then yous can send it over to your secondary device. Using the aforementioned terminal window on your rooted device, type the following command, so press enter.
cd /sdcard/Download The command volition redirect Termux to point to the "Download" folder, which is where we opted to store the required "magisk_patched.img" file. Then brand sure you type the folder location precisely as information technology appears; otherwise, the next step won't work correctly.
Step 12: Install Magisk
Finally onto the best part of this whole guide — it'due south time to install Magisk onto your secondary device. On your rooted device with the concluding, type the following control, and so press enter.
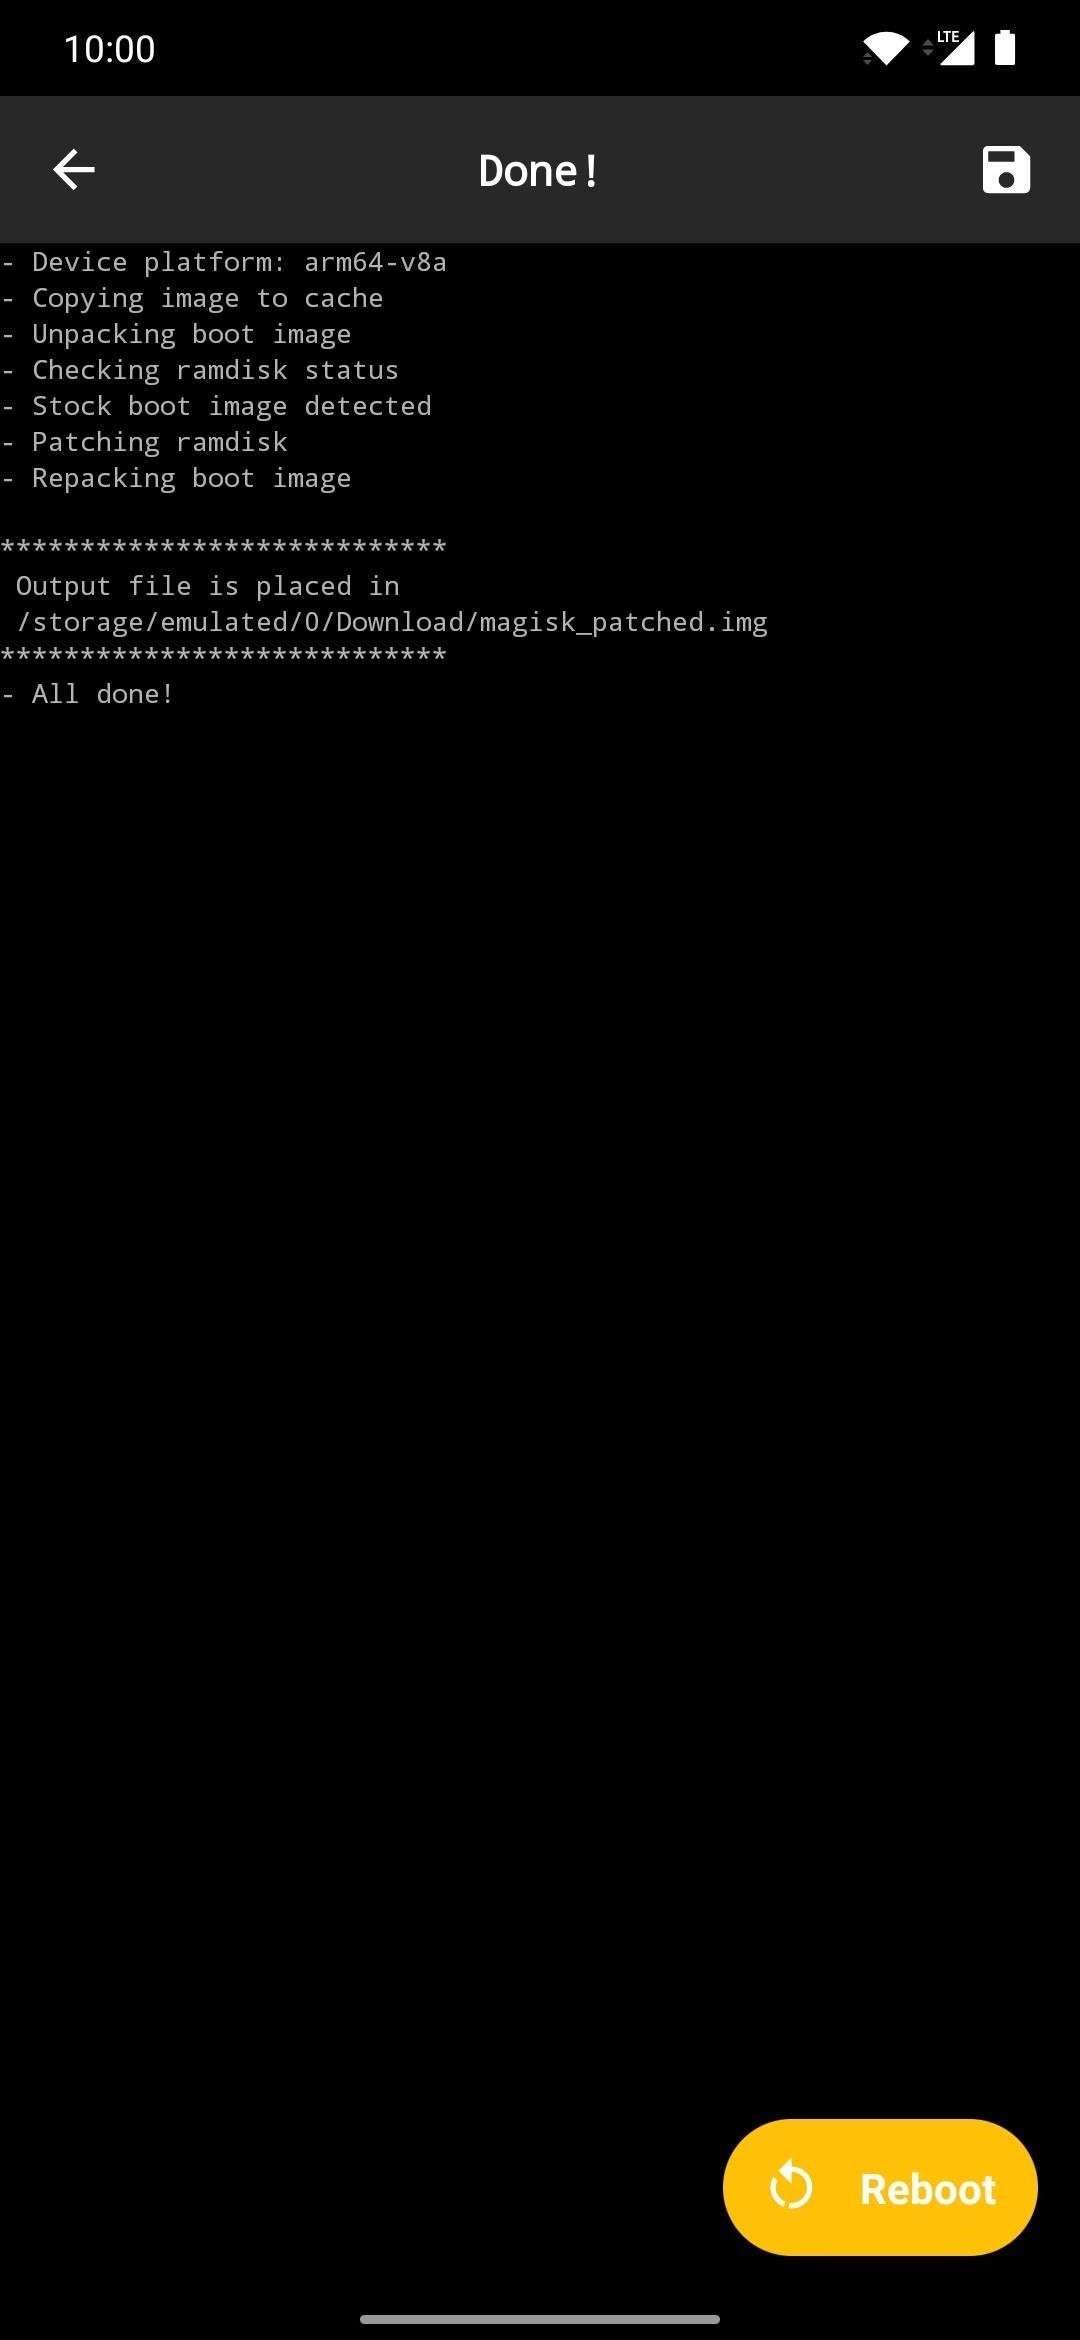
fastboot flash boot magisk_patched.img The control will immediately send over and install the magisk_patched.img file onto your device, which grants y'all root access.
One time that'due south finished, type the following command, then press enter.
fastboot reboot Your device will automatically reboot dorsum into Android, which ways installing Magisk was a success. At this point, you can safely disconnect the USB cable or OTG adapter and install Magisk Manager as usual. Now y'all know how to install Magisk without using a calculator or having TWRP admission just the same. This method will certainly come in handy for a variety of situations. Happy modding!
Keep Your Connection Secure Without a Monthly Bill. Go a lifetime subscription to VPN Unlimited for all your devices with a one-fourth dimension purchase from the new Gadget Hacks Shop, and picket Hulu or Netflix without regional restrictions, increase security when browsing on public networks, and more.
Buy Now (fourscore% off) >
Other worthwhile deals to bank check out:
- 41% off a home Wi-Fi analyzer
- 98% off a learn to code package
- 98% off an bookkeeping bootcamp
- 59% off the XSplit VCam video background editor
Source: https://android.gadgethacks.com/how-to/use-your-rooted-phone-root-another-phone-0292949/
0 Response to "Can You Root A Phone Remotely"
Post a Comment